Introduction:
Replacing a timing belt is a critical maintenance task that ensures the smooth operation and longevity of your vehicle’s engine. While it is generally recommended to have this procedure performed by a professional mechanic, experienced DIY enthusiasts with advanced mechanical skills may consider tackling the job at home.
This article aims to provide a comprehensive guide to help you understand the steps involved in replacing a timing belt and the precautions necessary to ensure a successful and safe DIY experience.
Disclaimer
It is important to note that working on a timing belt replacement requires technical expertise, and the process can vary significantly depending on your vehicle make and model.
Always consult your vehicle’s service manual for specific instructions and refer to the manufacturer’s recommendations.
If you’re unsure about your abilities or lack experience, it is strongly advised to seek professional assistance to prevent potential engine damage.
Tools and Preparation:
Before you begin, gather the necessary tools, including a comprehensive set of mechanic’s tools such as socket wrenches, screwdrivers, pliers, a torque wrench, and a suitable jack and jack stands.
Additionally, ensure you have the correct replacement timing belt for your vehicle, along with any associated gaskets, tensioners, and idler pulleys. Park your vehicle on a flat, stable surface, engage the parking brake, and disconnect the negative terminal of the battery for safety.
Step-by-Step Procedure:
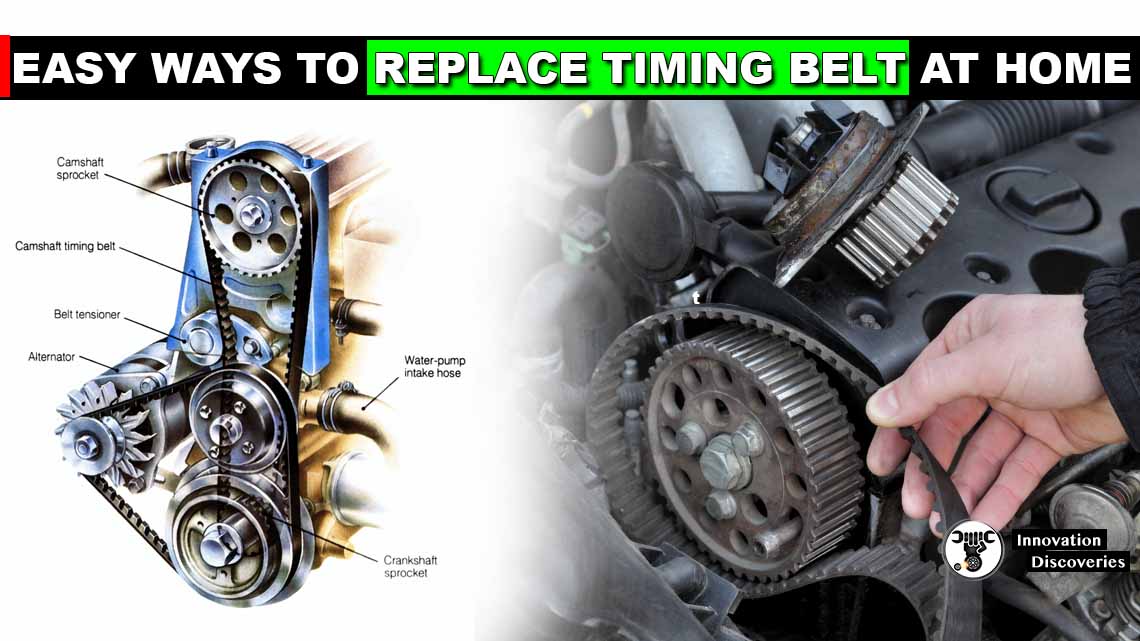
1. Identify the Timing Belt Components:
Consult your vehicle’s service manual to locate the timing belt cover and other components. You may need to remove other parts, such as the alternator or accessory drive belts, to gain access to the timing belt assembly.
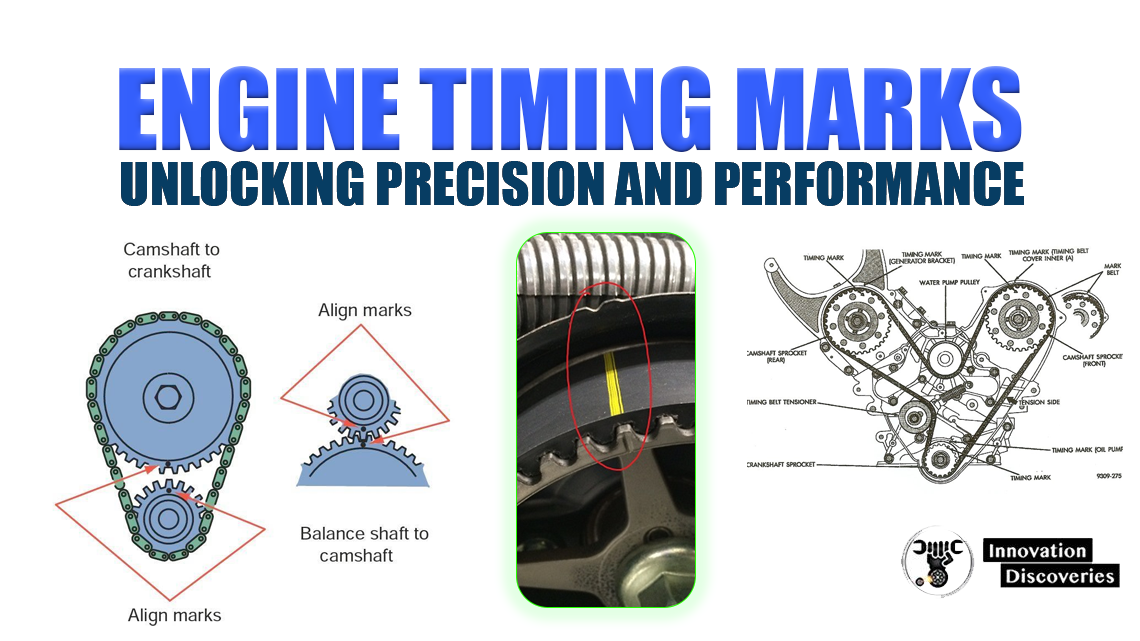
Take note of any markings or reference points for proper alignment during installation.
2. Remove the Old Timing Belt:
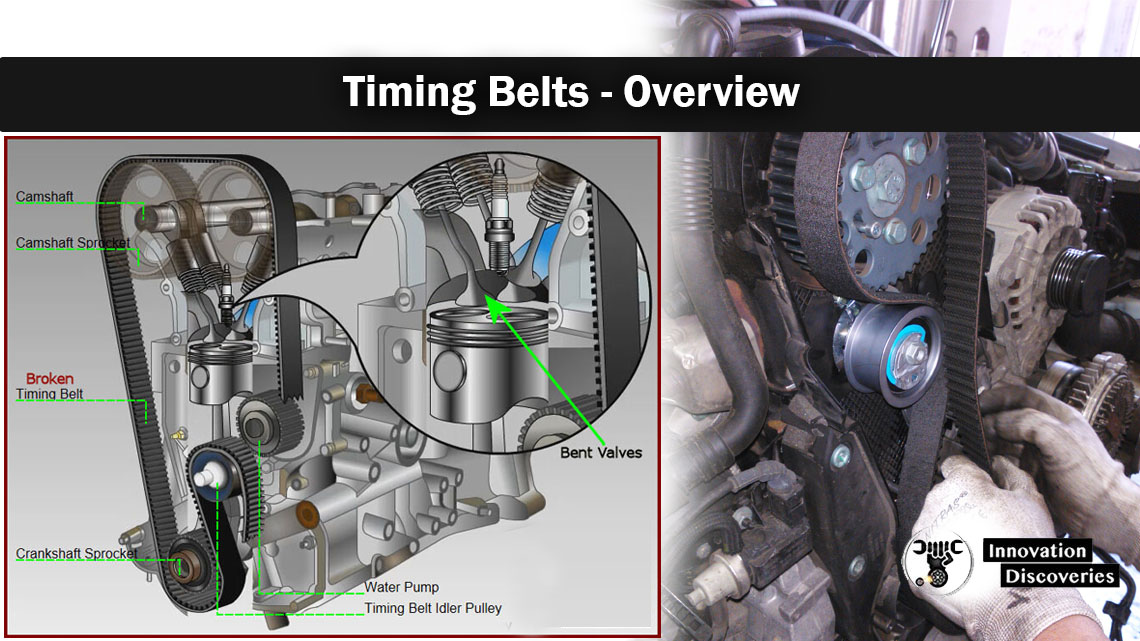
Loosen the tensioner and remove the old timing belt carefully. It is crucial to avoid disturbing the positions of the camshaft(s) and crankshaft during this process.
Pay attention to the routing of the belt and any specific instructions for your particular vehicle.
3. Inspect and Replace Components:
Take the opportunity to thoroughly inspect the condition of the tensioner, idler pulleys, and water pump. Replace any worn or damaged components to prevent future issues.
It is advisable to follow the manufacturer’s guidelines for replacing these parts while performing a timing belt replacement.
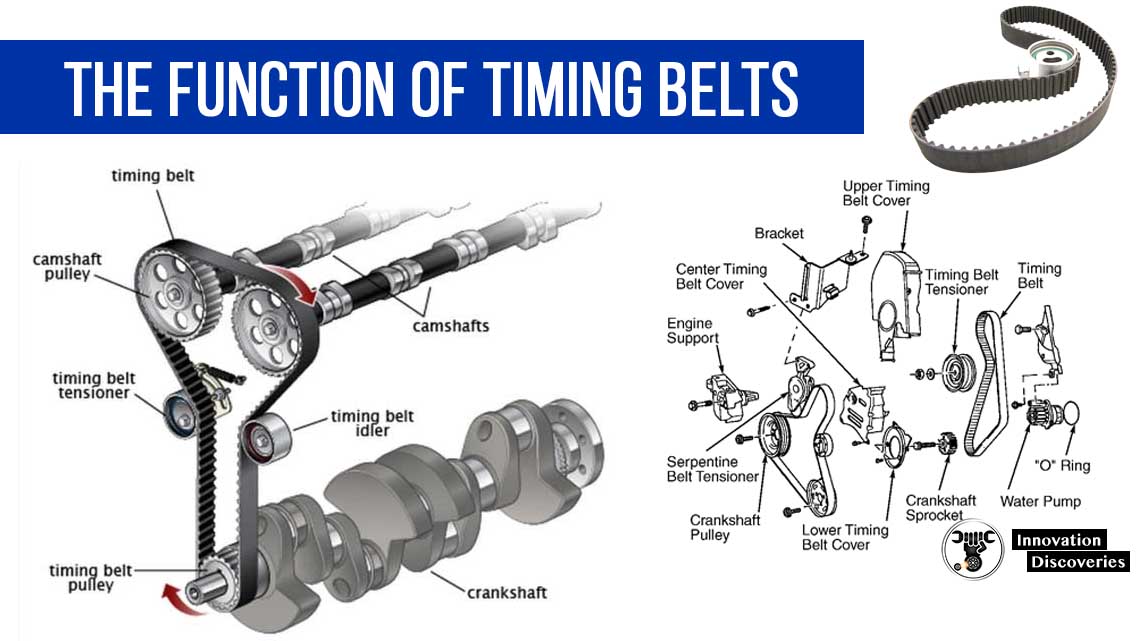
4. Install the New Timing Belt:
Follow the manufacturer’s specifications and reference the marked positions to install the new timing belt. Ensure the proper alignment of the crankshaft and camshaft(s) as you route the belt around the pulleys.
Refer to any specific torque specifications for tightening bolts, and adjust the tensioner according to the manufacturer’s guidelines to achieve the correct belt tension.
5. Reassemble and Test:
Reinstall any parts or components that were removed, such as the timing belt cover, alternator, or accessory drive belts. Double-check that all connections are secure and properly tightened.
Once everything is reassembled, reconnect the battery and start the engine to verify proper operation and timing belt function. Pay close attention to any unusual noises or irregularities during the initial startup.
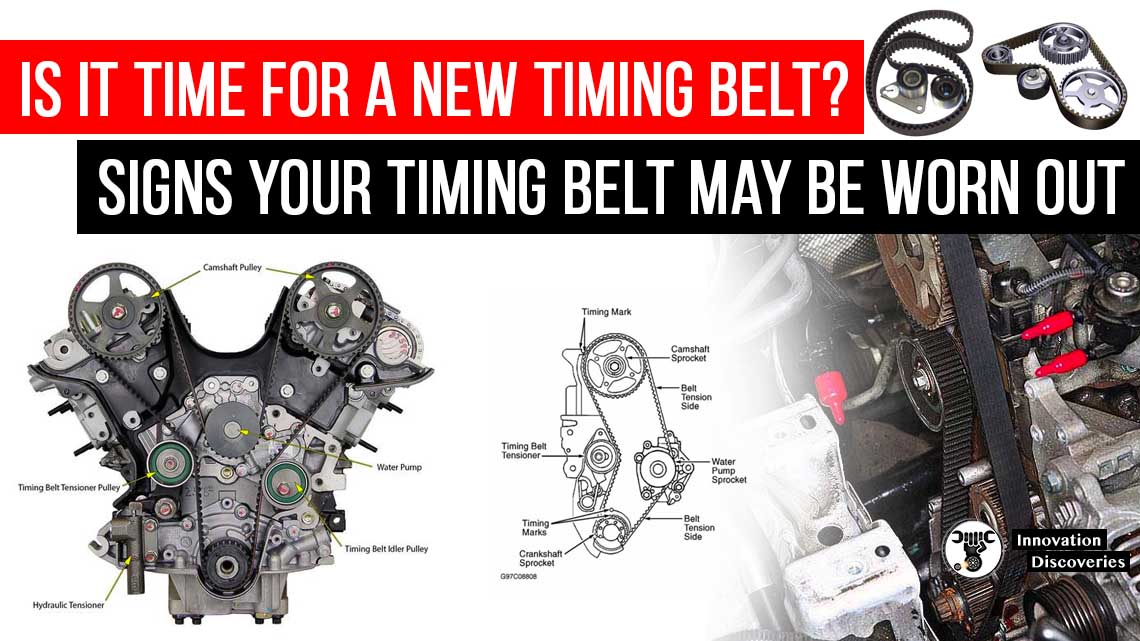
How to Detect and Replace Timing Belt
Detecting and replacing a timing belt is an important part of regular vehicle maintenance. The timing belt plays a crucial role in synchronizing the engine’s camshaft and crankshaft, and if it fails, it can lead to severe engine damage. Here are the steps to detect and replace a timing belt:
1. Consult the Service Manual:
Refer to your vehicle’s service manual to determine the recommended interval for timing belt replacement. Different manufacturers have different recommendations, usually based on mileage or time (e.g., every 60,000 miles or every 5 years). Adhering to these intervals is crucial to prevent timing belt failure.
2. Listen for Unusual Noises:
If your timing belt is worn or damaged, it may produce unusual noises. Listen for any squeaking, rattling, or slapping sounds coming from the engine area. These noises can indicate that the belt is loose or that the tensioner or idler pulley is failing.
3. Visual Inspection:
Perform a visual inspection of the timing belt. Look for signs of wear, cracks, fraying, or glazing on the belt surface. Additionally, check for oil or coolant leaks around the timing belt area, as these can lead to premature deterioration.
4. Check the Tension:
The tension of the timing belt is critical for proper operation. Use a tension gauge (if available) or check the belt tension by applying moderate pressure on the belt with your thumb. It should feel firm and not too loose. Excessive looseness or slack indicates that the belt needs to be replaced or the tensioner adjusted.
5. Seek Professional Inspection:
If you are unsure about the condition of your timing belt or if it has reached the recommended replacement interval, it is best to seek the assistance of a professional mechanic. They can perform a thorough inspection, including removing the timing belt cover if necessary, to assess its condition accurately.
6. Timing Belt Replacement:
If it is determined that your timing belt needs replacement, it is advisable to have a qualified mechanic perform the task. Replacing a timing belt involves removing various components and requires expertise to ensure proper alignment and tension. The mechanic will also inspect and, if necessary, replace other components such as the tensioner, idler pulleys, and water pump that may be affected by the timing belt replacement.
Remember, timing belt replacement is a crucial maintenance task that should not be ignored. Ignoring a worn or damaged timing belt can lead to catastrophic engine failure. Always refer to your vehicle’s service manual and consult a professional mechanic to ensure the timing belt replacement is done correctly and at the appropriate intervals.
Conclusion:
Replacing a timing belt at home can be a challenging task, requiring advanced mechanical skills, specific tools, and a good understanding of your vehicle’s components.
While this guide provides a general overview of the process, it is essential to consult your vehicle’s service manual for detailed instructions and adhere to the manufacturer’s recommendations.
If you are unsure about your abilities or lack experience, it is strongly advised to seek the assistance of a qualified mechanic who can ensure the job is done correctly, safeguarding your vehicle’s engine and your safety on the road.
FOR MORE KNOWLEDGE
- WHAT HAPPENS WHEN A TIMING CHAIN BREAKS WHILE DRIVING
- VEHICLE SERPENTINE BELTS
- WHAT’RE THAT SOUND? 5 NOISES YOU NEVER WANT TO HEAR FROM YOUR CAR
- 4 COMMON ENGINE MISFIRE CAUSES
- HOW DOES AN INTEGRATED MOTOR ASSIST OPERATE?
Read More:
- Here’s How You Quickly Stop a Runaway Diesel
- The engine – how it drives its ancillary parts
- Water Pump Replacement
- 5 Reasons Behind Car Engine Vibration
- VALVE TRAIN: COMPONENTS, TYPES AND THEIR FUNCTION
- Symptoms of an Exhaust Leak


I have learned. Thanks.
you’re welcome
Thanks man