Introduction:
As the temperatures rise, there’s nothing quite like the relief of turning on your car’s air conditioner on a hot day. But what if you find that your AC isn’t blowing as cold as it used to?
One of the common reasons for this could be a low level of refrigerant, commonly known as Freon.
In this guide, we’ll walk you through the process of adding Freon to your car’s air conditioner, ensuring you stay cool and comfortable on the road.
Step 1:
Gather Your Tools and Materials Before you begin, it’s essential to gather all the necessary tools and materials. Here’s what you’ll need:
- Safety glasses and gloves
- Refrigerant (Freon) with the appropriate specifications for your vehicle
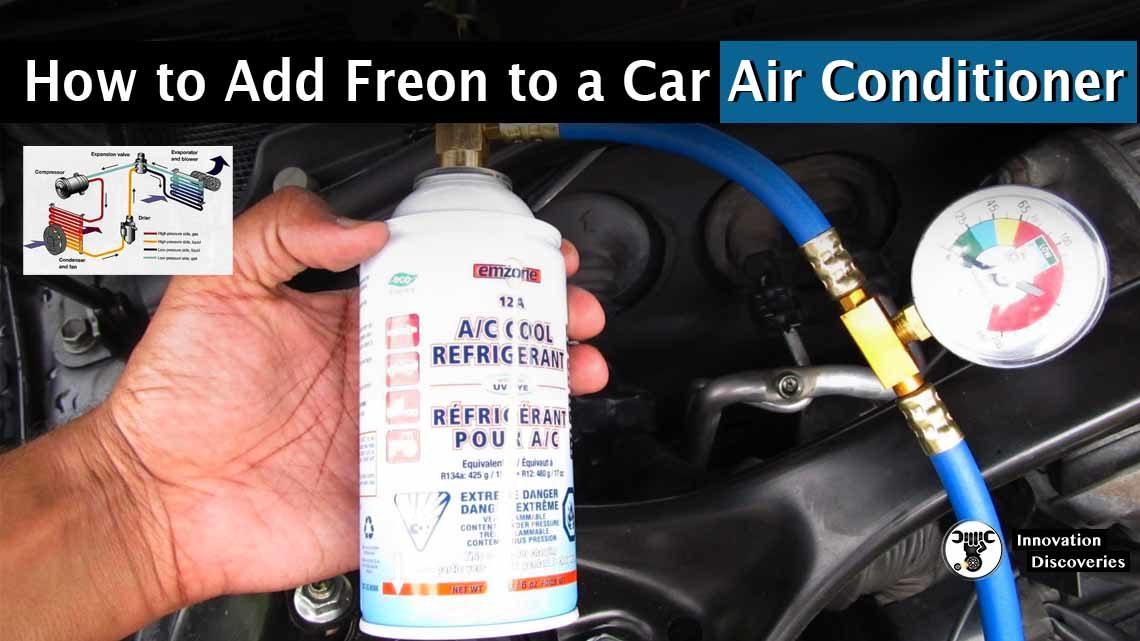
- Pressure gauge and hose kit
- Owner’s manual for your car
Step 2:
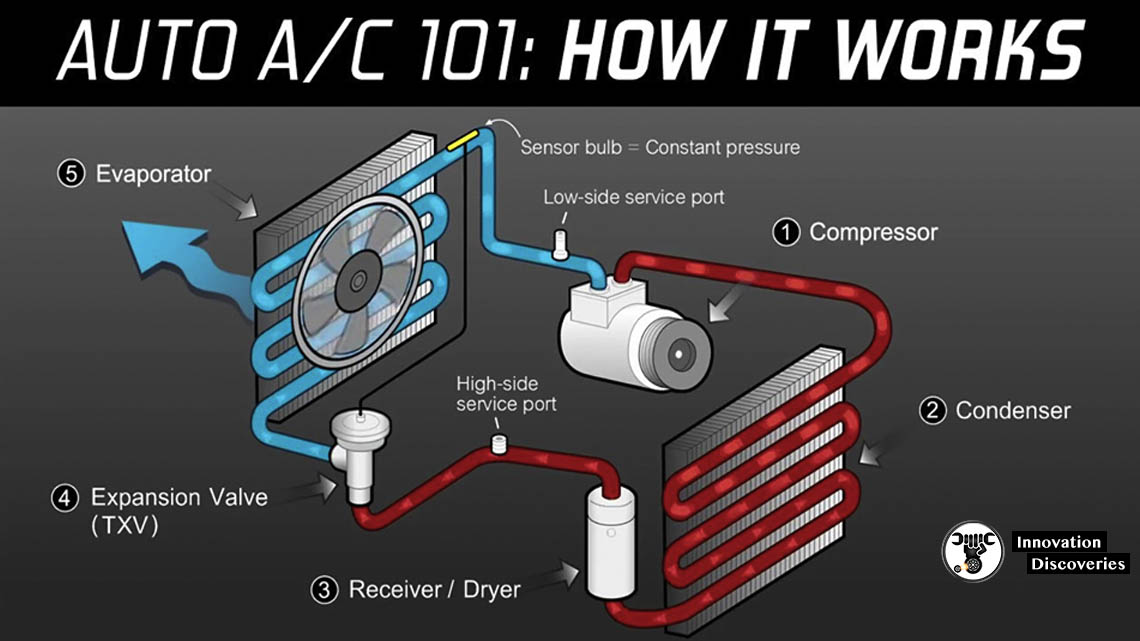
Locate the Low-Pressure Port The low-pressure port is where you’ll connect the refrigerant hose to add Freon to your car’s AC system.
Refer to your owner’s manual to locate the low-pressure port as it varies depending on the make and model of your vehicle.
Typically, the port is located near the AC compressor and is marked with an “L” or “LOW” on the cap.
Step 3:
Prepare the System Before adding Freon, it’s crucial to prepare the system properly. Start by ensuring that your car is parked on a level surface with the engine turned off.
Next, pop the hood and locate the AC compressor. Inspect the compressor and hoses for any signs of leaks or damage. If you notice any leaks, it’s best to address them before proceeding further.
Step 4:
Attach the Pressure Gauge and Hose With the low-pressure port located and the system inspected, it’s time to attach the pressure gauge and hose kit.
Connect the hose to the low-pressure port by screwing it on securely. Make sure it’s tightly attached to prevent any leaks during the process.
Step 5:
Start the Engine and Turn on the AC Once the hose is connected, start the engine and turn on the air conditioner to its maximum setting.
This step is crucial as it allows the compressor to engage and the refrigerant to circulate through the system.
Step 6:
Check the Pressure With the AC running, check the pressure gauge to determine the current level of refrigerant in the system.
The gauge will provide readings indicating whether the system needs additional Freon. Refer to your owner’s manual for the recommended pressure range for your vehicle.
Step 7:
Add Freon If the pressure reading indicates that the system is low on refrigerant, it’s time to add Freon. Follow the instructions on the refrigerant canister carefully, as overcharging the system can cause damage.
Slowly introduce the Freon into the system, periodically checking the pressure gauge to ensure you don’t overfill.
Step 8:
Monitor the System As you add Freon, keep an eye on the pressure gauge and monitor the system for any signs of leaks or abnormalities.
If you notice any sudden changes in pressure or unusual noises coming from the compressor, stop the process immediately and seek professional assistance.
Step 9:
Disconnect the Hose and Check the System Once you’ve added the appropriate amount of Freon and the pressure gauge indicates that the system is within the recommended range, it’s time to disconnect the hose from the low-pressure port.
Double-check that the connection is tight before closing the hood.
Step 10:
Test the AC After adding Freon, take your car for a test drive to ensure that the air conditioner is blowing cold air as expected.
If everything appears to be working correctly, congratulations – you’ve successfully added Freon to your car’s air conditioning system!
Cautions and Tips
1. Safety First:
Always wear safety glasses and gloves when working with refrigerants to protect your eyes and skin from potential contact.
2. Follow Manufacturer Guidelines:
Refer to your vehicle’s owner’s manual and follow the manufacturer’s guidelines for adding refrigerant. Using the wrong type or amount of refrigerant can damage your AC system.
3. Check for Leaks:
Before adding Freon, inspect the AC system for any signs of leaks, such as oily residue around fittings or hoses. Address any leaks before proceeding with the recharge to prevent Freon from escaping and causing further damage.
4. Avoid Overcharging:
Adding too much Freon can cause excessive pressure within the AC system, leading to potential damage. Use a pressure gauge to monitor the system’s pressure and add Freon gradually to avoid overcharging.
5. Monitor System Performance:
After adding Freon, pay attention to the performance of your car’s air conditioner. If you notice any unusual noises, a decrease in cooling efficiency, or other abnormalities, stop the process and seek professional assistance.
6. Use Caution with DIY Kits:
While DIY refrigerant recharge kits are available, they may not always provide accurate pressure readings or proper instructions. If you’re unsure about using a DIY kit, it’s best to consult a professional mechanic.
7. Proper Disposal:
Dispose of any unused refrigerant or empty canisters properly according to local regulations. Improper disposal can harm the environment and pose health risks.
8. Seek Professional Help if Needed:
If you’re uncomfortable or unsure about adding Freon yourself, it’s always best to seek assistance from a qualified mechanic or HVAC technician. They have the expertise and equipment to safely recharge your car’s AC system.
By following these cautions and tips, you can add Freon to your car’s air conditioner safely and effectively, ensuring optimal performance and comfort during your drives.
Conclusion:
Maintaining the proper level of refrigerant in your car’s air conditioning system is essential for staying comfortable on the road, especially during the hot summer months.
By following these steps and taking the necessary precautions, you can ensure that your AC operates efficiently and keeps you cool during your travels.
If you’re unsure about adding Freon yourself or encounter any difficulties along the way, don’t hesitate to seek assistance from a professional mechanic. Stay cool out there!
Also, read:
- 3 Bad Idle Air Control Valve Symptoms (and Replacement Cost)
- Car Cooling System – What To Do To Keep Its Cool?
Discover More:
DOWNLOAD
Visit Forum
Visit Our Friendly Website


