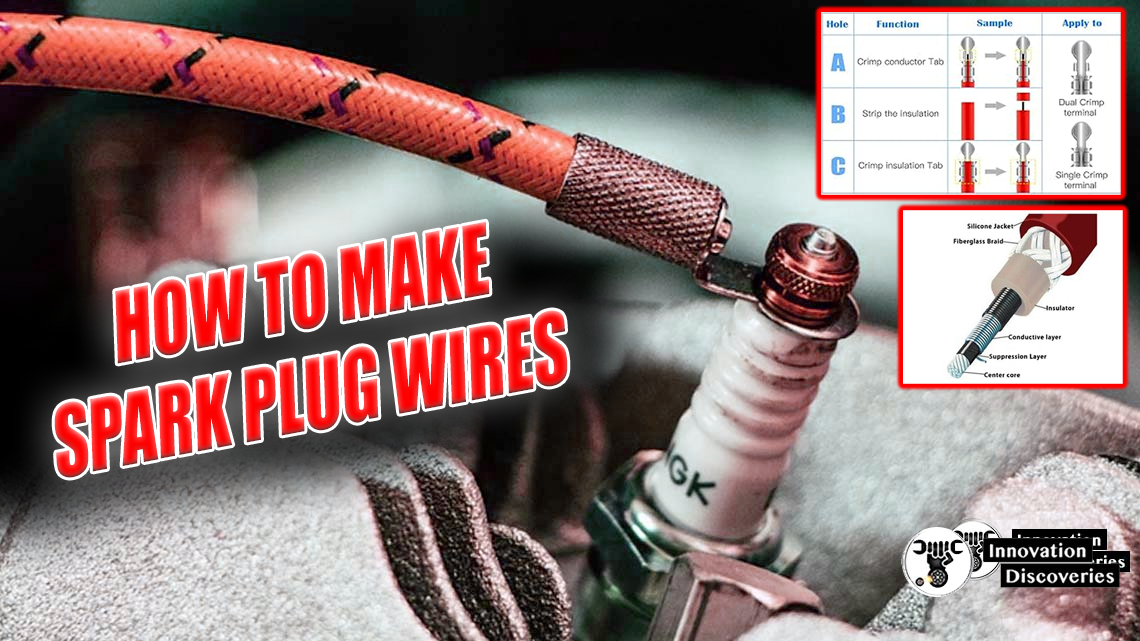
Spark plug wires, also known as ignition wires, are essential components of a vehicle’s ignition system. They carry high-voltage electricity from the ignition coil to the spark plugs, which ignite the air-fuel mixture in the engine cylinders.
Over time, spark plug wires can wear out and cause engine misfires, reduced performance, and poor fuel economy. Making your own spark plug wires can be a cost-effective and rewarding way to ensure your engine runs smoothly.
In this article, we will guide you through the process of making custom spark plug wires.
Tools and Materials Needed
Before you start, gather the following tools and materials:
- Spark plug wire set (available at auto parts stores)
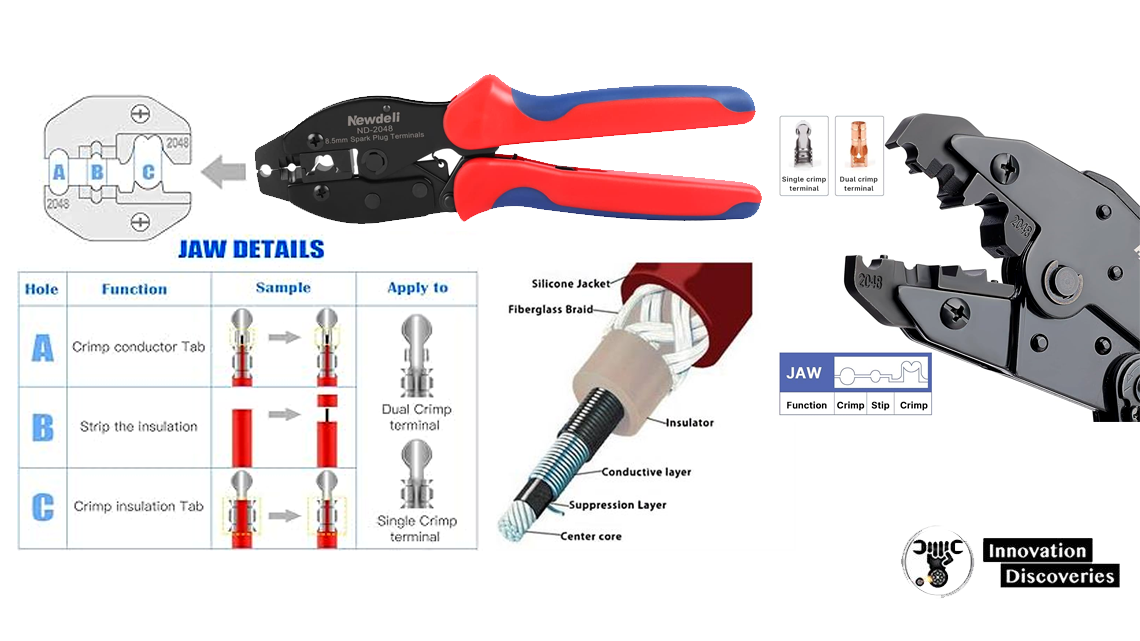
- Spark plug wire crimping tool
- Wire cutters
- Spark plug boots
- Distributor boots (if applicable)
- Dielectric grease
- Measuring tape or ruler
Step-by-Step Guide
1. Choose the Right Spark Plug Wire Set
First, ensure you have the correct spark plug wire set for your vehicle. Spark plug wires come in various lengths and resistance levels. Refer to your vehicle’s manual or consult with an auto parts store specialist to find the right set for your engine.
2. Measure and Cut the Wires
Measure the distance from the distributor or ignition coil to each spark plug. Add a little extra length to account for routing the wires neatly and avoiding sharp bends. Use a measuring tape or ruler to ensure accurate measurements. Once you have the correct length, use wire cutters to cut the spark plug wires.
3. Strip the Insulation
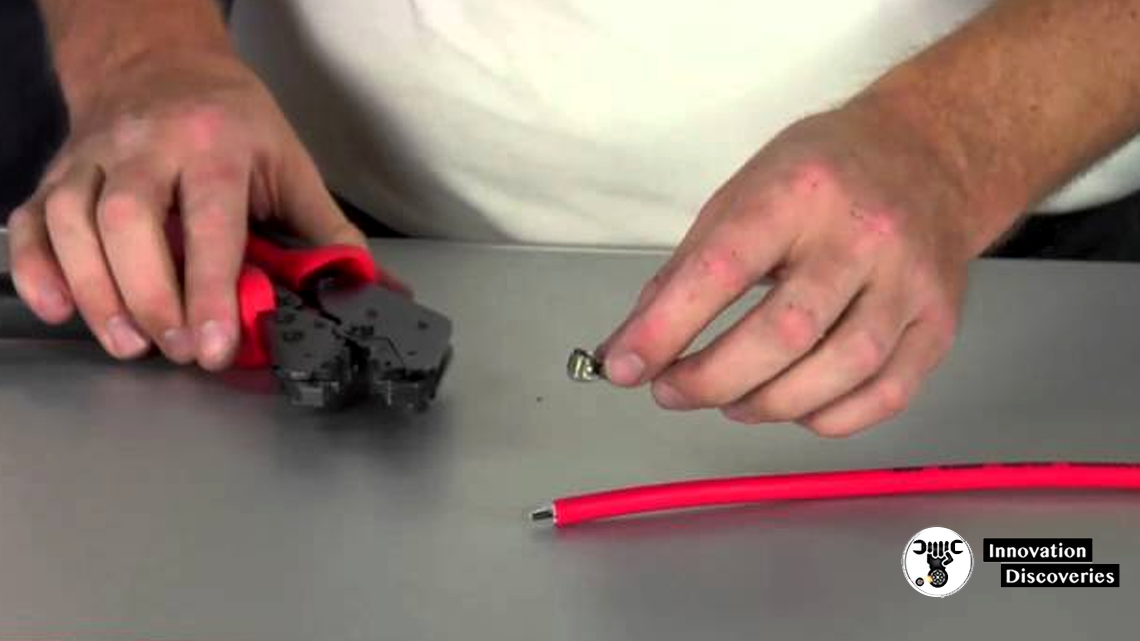
Carefully strip about 1/2 inch (12 mm) of insulation from the end of each wire. Be cautious not to damage the inner conductor. The stripped end should expose the core wire without fraying.
4. Attach the Terminals
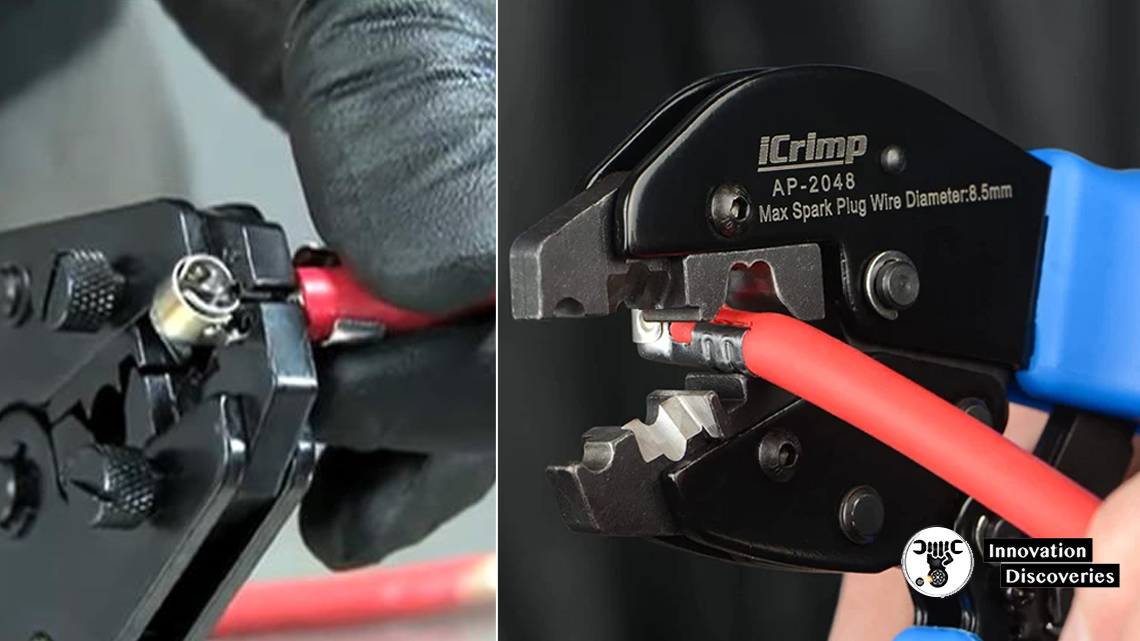
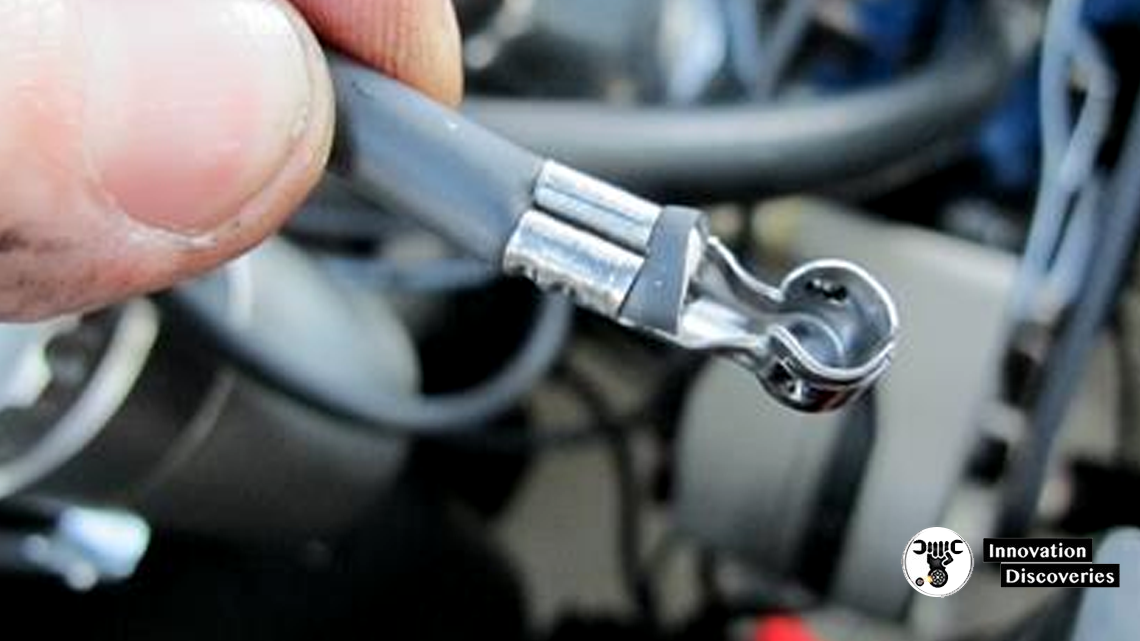
Slide the spark plug boot onto the wire before attaching the terminal. This step is crucial, as it ensures the boot is in place before crimping the terminal. Next, take the appropriate terminal for your spark plug or distributor (depending on which end you’re working on) and insert the stripped wire into the terminal.
5. Crimp the Terminals
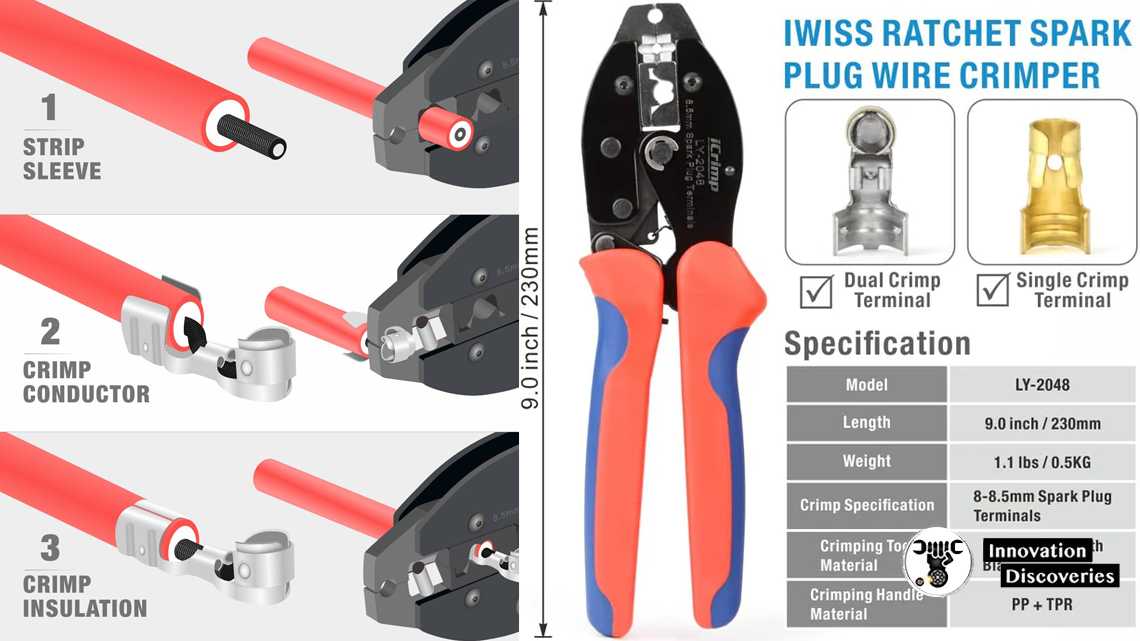
Using the spark plug wire crimping tool, crimp the terminal onto the wire. Ensure the terminal is securely attached to the wire to prevent it from coming loose. A proper crimp ensures a good electrical connection and prevents misfires.
6. Apply Dielectric Grease
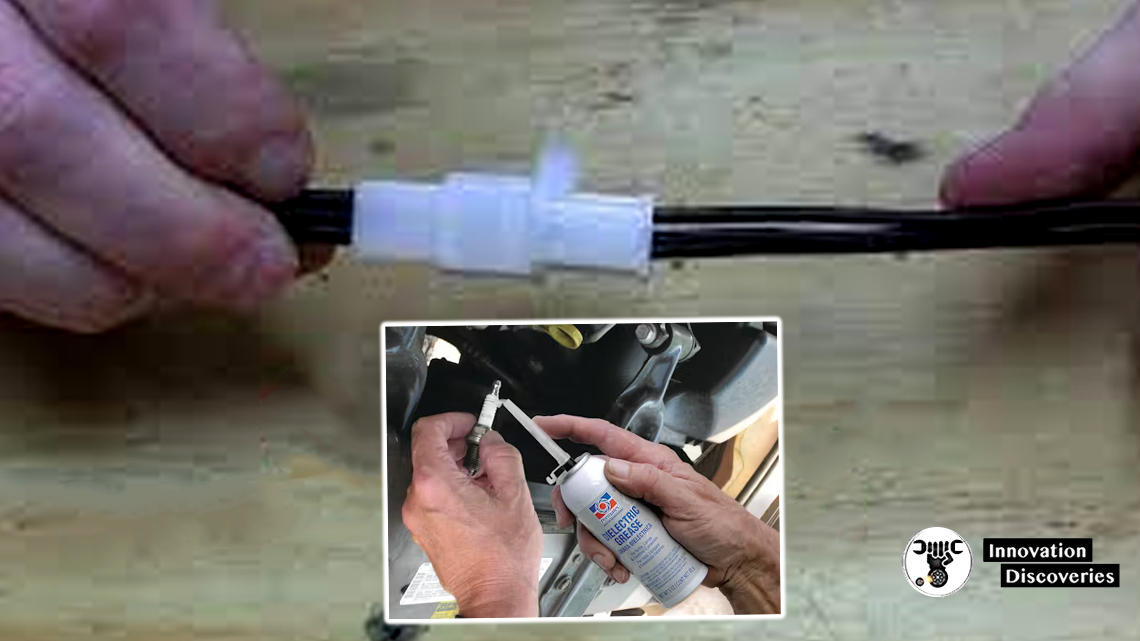
Apply a small amount of dielectric grease to the inside of the spark plug boot. This grease helps to prevent moisture from entering the connection and ensures a good electrical contact. Slide the boot over the terminal and onto the wire. Repeat this step for the distributor or ignition coil boot.
7. Install the Wires
Carefully route the spark plug wires from the distributor or ignition coil to the spark plugs. Avoid sharp bends and ensure the wires are not in contact with hot engine parts. Use wire separators or looms to keep the wires organized and prevent them from touching each other.
8. Test the Installation
After installing the spark plug wires, start the engine to ensure everything is working correctly. Listen for any misfires or unusual noises. If the engine runs smoothly, you’ve successfully made and installed your own spark plug wires.


Tips for Success
- Double-check measurements: Accurate measurements are crucial to ensure the wires fit properly and avoid any excess slack or tension.
- Use quality materials: Invest in high-quality spark plug wires and terminals to ensure longevity and reliable performance.
- Keep wires organized: Use wire separators or looms to keep the wires neatly organized and prevent them from touching each other or hot engine parts.
When making your own spark plug wires, there are several potential points of failure. Here’s a breakdown of the common issues you might encounter and how to solve or minimize them:
Common Issues and Solutions
1. Poor Crimping
Issue: If the terminals are not crimped properly, it can lead to poor electrical connections, resulting in misfires or engine performance issues.
Solution: Use a high-quality crimping tool designed specifically for spark plug wires. Ensure the crimp is tight and secure by giving the terminal a gentle tug after crimping to check for stability.
2. Incorrect Wire Length
Issue: Wires that are too short may not reach the spark plugs comfortably, leading to tension and potential disconnection. Wires that are too long can result in excess slack, causing them to come into contact with hot engine parts or sharp edges.
Solution: Measure the distance carefully and add a little extra length for routing. Double-check measurements before cutting the wires.
3. Damaged Insulation
Issue: Stripping too much insulation or damaging the inner conductor while stripping can lead to short circuits or electrical leakage.
Solution: Use a wire stripper tool to carefully strip the insulation, exposing only the required length of the inner conductor. Avoid using excessive force.
4. Poor Boot Installation
Issue: If the boots are not installed properly, they may not provide adequate insulation or protection, leading to moisture ingress and poor connections.
Solution: Apply dielectric grease inside the boots before sliding them onto the terminals. Ensure the boots fit snugly and are fully seated over the terminals.
5. Routing and Separation Issues
Issue: Improper routing of spark plug wires can lead to interference from other engine components, resulting in electrical noise or crossfire.
Solution: Route the wires neatly using wire separators or looms. Keep the wires away from hot engine parts, sharp edges, and moving components. Maintain a gap between wires to prevent crossfire.
6. Use of Inferior Materials
Issue: Using low-quality wires or terminals can result in premature wear, poor conductivity, and reduced performance.
Solution: Invest in high-quality spark plug wires and terminals that are designed for your specific vehicle. This will ensure durability and reliable performance.
7. Inadequate Testing
Issue: Failing to test the wires after installation can result in undetected issues that affect engine performance.
Solution: After installation, start the engine and listen for any misfires or unusual noises. Perform a visual inspection to ensure all connections are secure and the wires are routed properly.
General Tips for Minimizing Failure
- Plan Ahead: Take your time to measure and cut the wires accurately. Double-check your measurements before making any cuts.
- Stay Organized: Keep all tools and materials within reach and organized. This helps to avoid mistakes and ensures a smooth workflow.
- Follow Instructions: If the spark plug wire set comes with specific instructions, follow them closely. Manufacturer guidelines can provide valuable insights for optimal installation.
- Use Dielectric Grease: This helps to prevent moisture ingress and ensures a good electrical contact.
- Regular Inspection: Periodically inspect the spark plug wires for any signs of wear or damage. Early detection can prevent potential issues.
By following these guidelines and taking a meticulous approach, you can significantly reduce the chances of failure and ensure your custom spark plug wires perform reliably and effectively.
Conclusion
Making your own spark plug wires can be a rewarding DIY project that saves you money and ensures your engine runs efficiently. With the right tools, materials, and careful attention to detail, you can create custom spark plug wires that fit your vehicle perfectly. Follow this step-by-step guide to make your own spark plug wires and keep your engine performing at its best.
Discover More:
- How to Replace Worn Spark Plugs in a Car
- Common Spark Plug Misfire Symptoms
- How Variable Valve Timing Works, And How it Makes Your Engine Better
- Professional Tips On How To Start A Flooded Engine
Visit Forum
Visit Our Friendly Website




12 Comments