Check drum brakes at least every six months, 6,000 miles (ca. 9,656 km) or 10,000 km, or as recommended in the car’s normal service schedule. Look for worn brake linings.
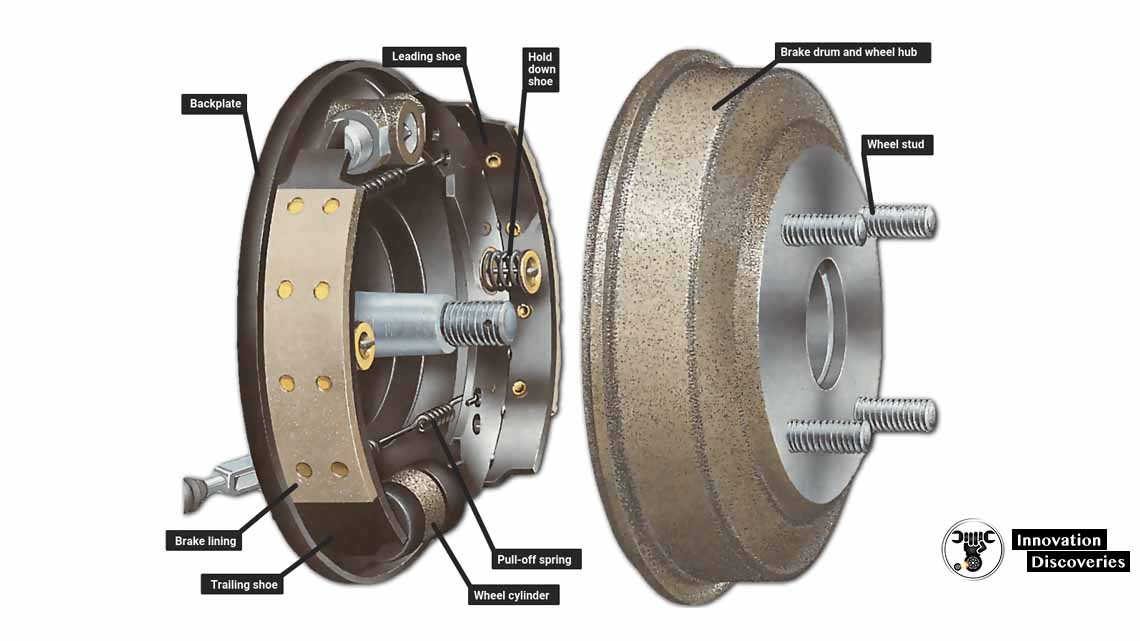
Integral drum brake
Later cars often have a plugged inspection hole in the backplate. On other cars, you need to remove the drum.
Linings may be riveted or bonded to the brake shoes. With riveted linings,
Replace the shoes well before the lining wears down to the
Level of the rivet heads. Exposed heads score and ruin the brake drums.
Shoes with bonded lining should, for safety,
Be replaced when the lining is worn to & 1/10 in. (3 mm) thick, even if a minimum thickness of 1/16 in. (1.5 mm) is quoted in the car handbook.
Always renew brake shoes on both wheels on an axle,
Even if the lining on one wheel is less worn than on the other. Renew on both wheels also if one lining has been fouled by oil or brake fluid. Otherwise, braking will be unbalanced.
Buy only brake shoes that have a well-known maker’s name clearly
Marked and correctly spelled on the box. Dangerous fakes are common they often have names only slightly
Altered from a well-known make.
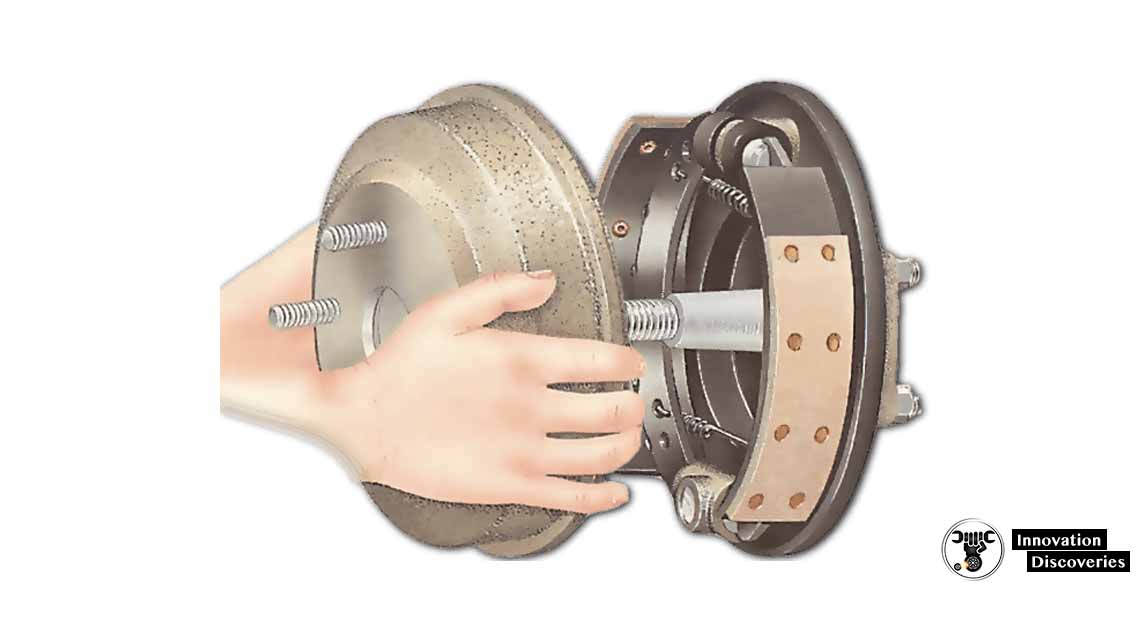
Separate drum brake
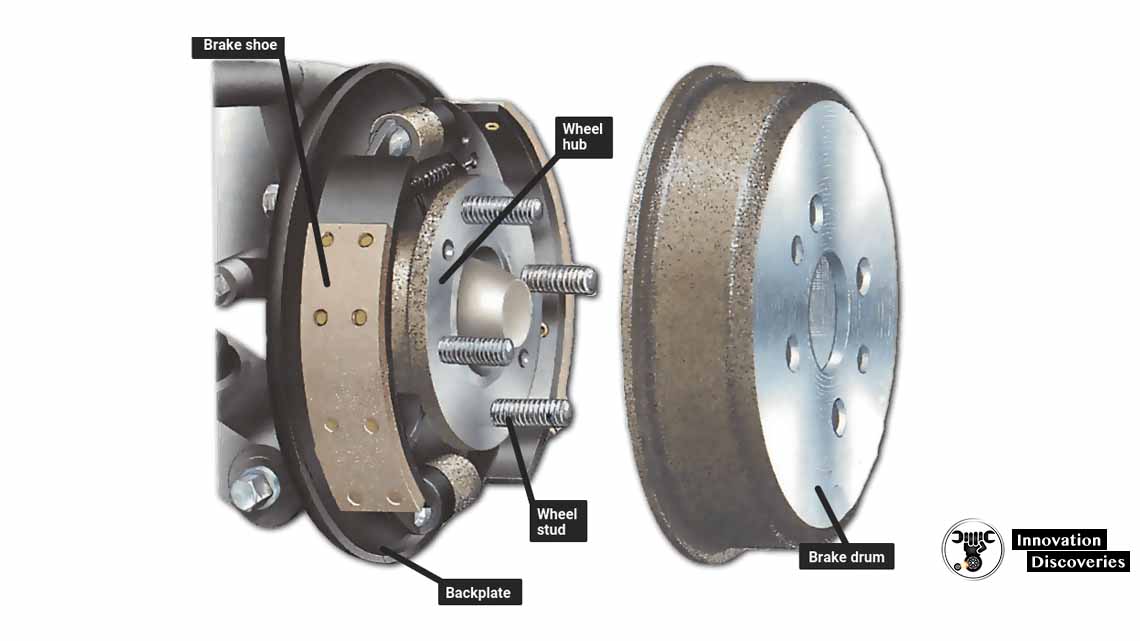
The hub stays in place when the linings are changed.
If you have to get under the car,
To look through the inspection hole in the backplate,
For example, raise the car and support it on axle stands, not just on jacks.
When working on brakes, take care not to inhale brake dust from drums
It contains poisonous asbestos, used in the manufacture of the linings.
Work on rear brakes has to be done with the handbrake off be sure to
Chock the wheels on the ground firmly on both sides.
When dismantling brakes, have a pencil and paper ready to draw the sometimes
Complicated way in which certain parts fit together.
Vital details include which way round brake shoes fit;
The holes into which springs fit (there may be several similar-looking holes near the correct one);
Which way round springs go (the ends are often not the same length);
The position of retaining pins and automatic adjustment parts;
And the order in which washers are fitted.
If the brakes are adjusted manually, slacken them before you remove the drums.
With self-adjusting brakes, slackening is usually neither necessary nor possible.
A few cars have a hole in the drum through which you can use two screwdrivers to
Lift the pawl of the adjusting ratchet wheel and turn the wheel back.
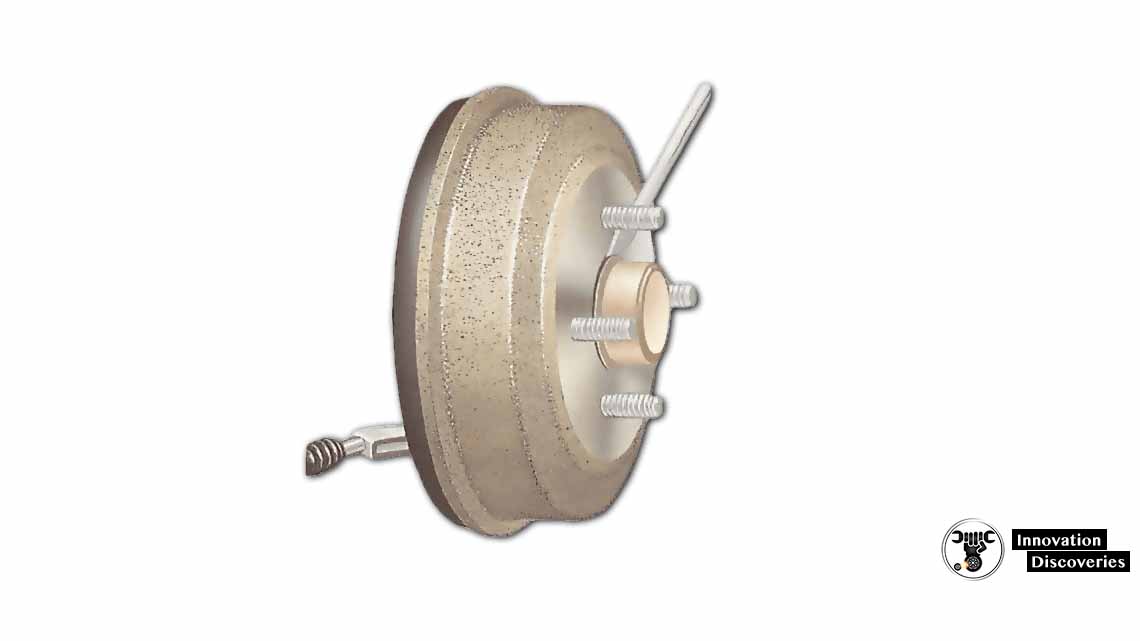
The brake drum may be integral with the wheel hub, or separate.
Removing an integral drum
Prise off the central cap with a screwdriver if you can;
Lever evenly round the edge if it becomes crooked it will stick.
If levering fails, try tapping gently round the edge of the cap with a hammer and chisel.
If the cap has no lip to give you leverage, drill a hole in it,
Insert a self-tapping screw and pull it with a claw hammer. Plug the hole before refitting the cap.
If all else fails, knock off the cap with a hammer and chisel new caps are inexpensive.
Prise off the central cap with a screwdriver, working evenly around its lip.
Under the cap, there may be a castellated nut or a castellated cap over a plain nut,
Held by a split pin. Straighten the legs of the split pin and pull it out,
Starting by tapping it with a hammer if necessary.
Always use a new split pin when reassembling.
Examine the nut carefully to see if it has a left-hand thread. It is tightened to a precise torque, which varies greatly from car to car. Before refitting, check the figure with your
Local dealer or the car service manual.
For very tight nuts, ask a helper to apply the brakes while you unscrew the nut using a Length of pipe over the socket-wrench handle to give extra leverage.
With the nut removed, pull the drum off by hand if possible. It will come away complete with bearings. Spread a cloth on the ground to catch any bearings that may fall.
With the nut removed, you may be able to pull the drum and hub off by hand. Spread a clean rag on the ground sometimes a bearing falls free as the hub comes off.
If the assembly is stiff, try refitting the wheel and pulling that. But do not lever the lip of the drum, or you may damage it. In severe cases, you may need a hub puller,
Which you can hire if necessary.
You may also need a hub puller if the inner track of the inner wheel bearing stays
Fixed on the axle, as it sometimes does. Put a hose clip round or behind it to give the puller legs a good grip.
Checking wear on brake-shoe linings
Check the wear on riveted linings with a Tyre tread-depth gauge.
The linings should be renewed when they are worn to 1.5 mm above the rivet heads.
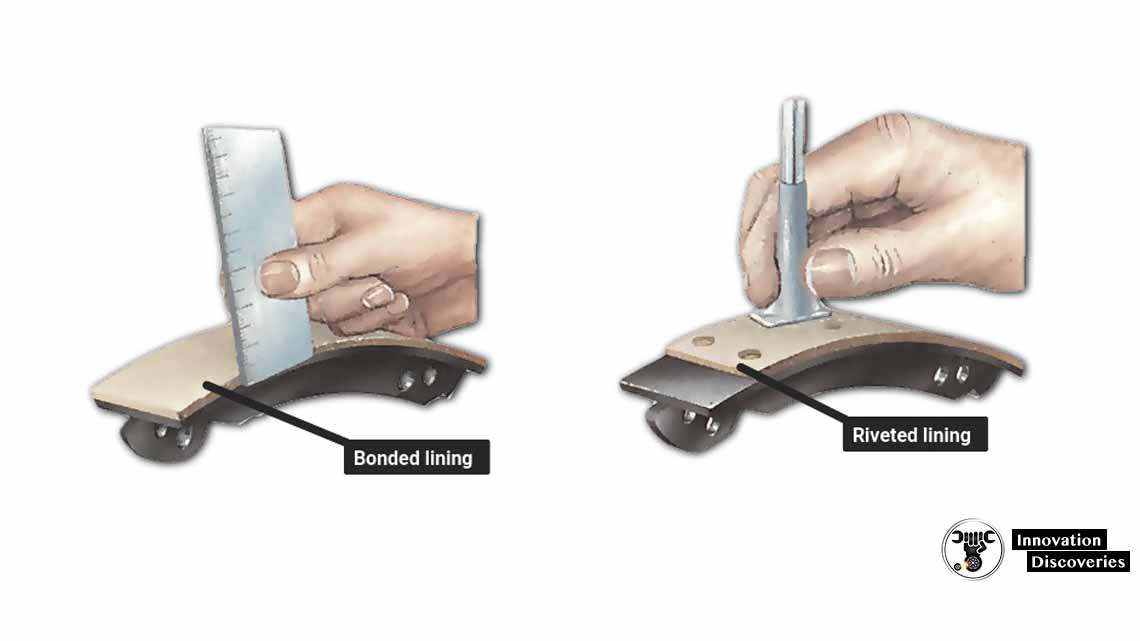
Use a rule to check the thickness of a bonded lining,
Measuring from the face of the shoe to the top of the lining.
Replace shoes with the lining worn to 3 mm thickness.
Removing a separate drum
The drum may be held on by one or two set-screws or hexagonal-headed bolts.
Remove them.
Alternatively, the drum may be held by a spring clip on one wheel stud,
Or there may be no fixing at all.
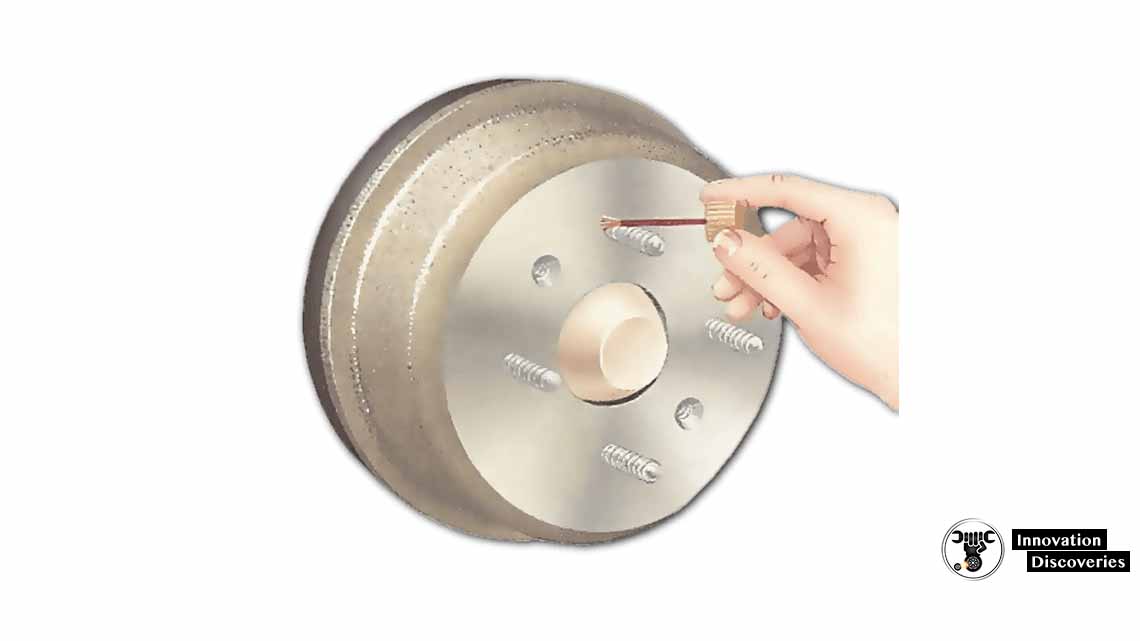
So that you can refit the drum in the same position,
Paint a mark on one wheel stud and against the hole in the drum through which it fits.
If the wheel has been balanced on the car,
The balance of the brake drum will have been taken into account. Refitting it in the same position will avoid upsetting it.
Mark one wheel stud and hole with paint so that you can refit the drum in the same position.
Pull the drum straight off if you can. If it sticks, try tapping all round the edge of the drum not the lip with a soft-faced hammer.
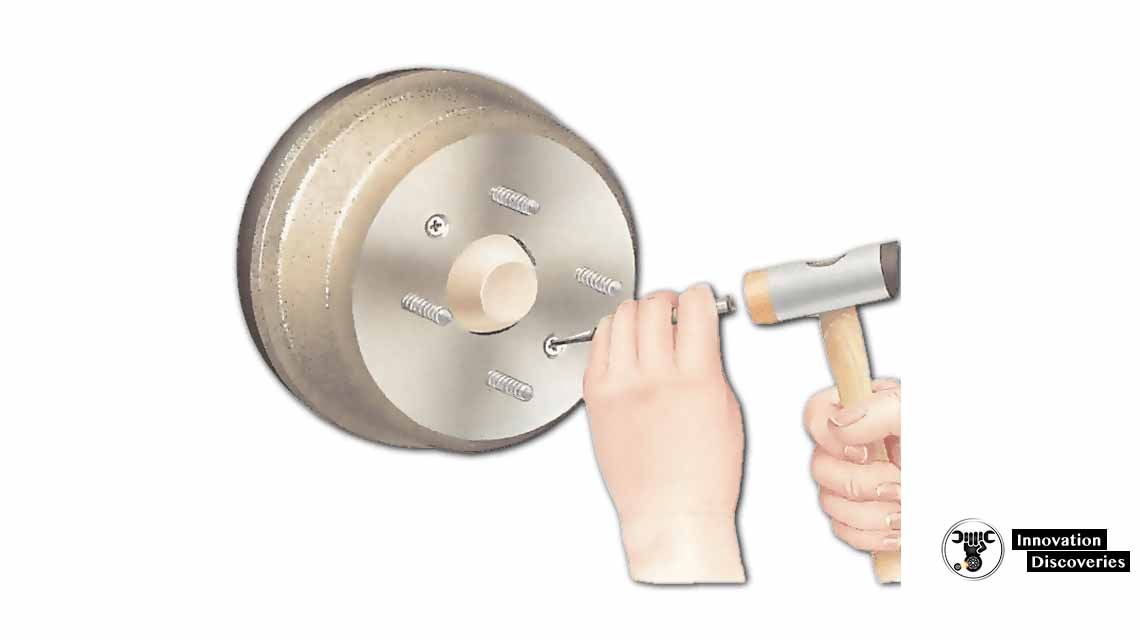
Offset from the slot, in the unscrewing direction. Or use an impact driver.
If the drum sticks, tap round the edge with a soft-faced hammer.
If tapping fails to move the drum,
Put penetrating oil on the studs and the joint between the drum and hub,
And leave it for a while. Another method is to wrap the drum in rags and
Pour boiling water over it to make the drum expand.

So that you can refit the drum in the same position.
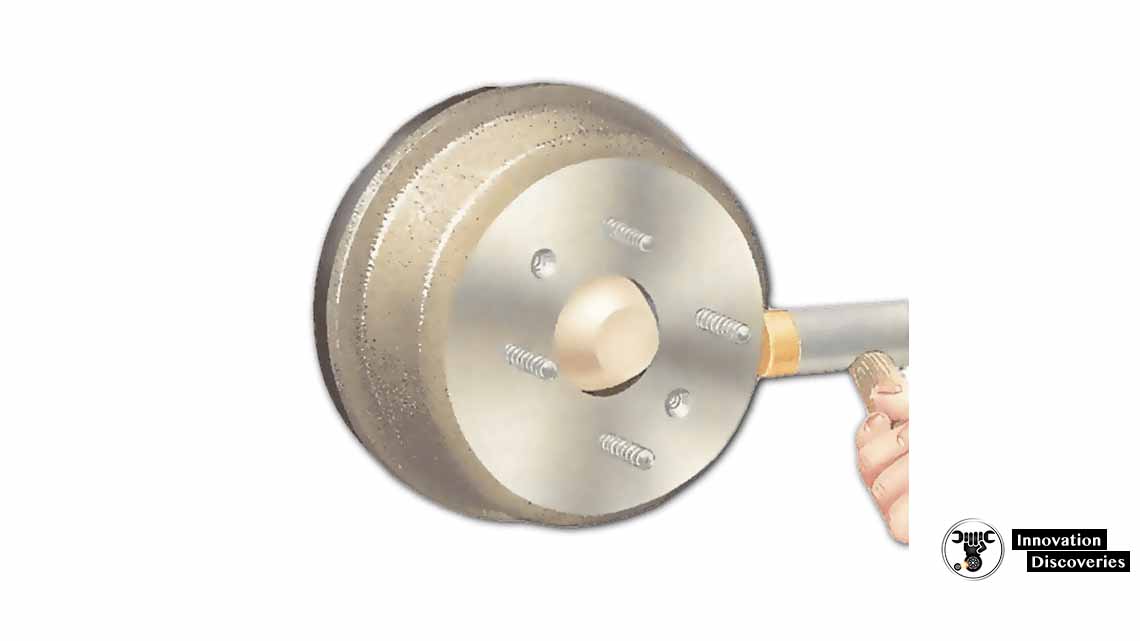
Take care not to hit the lip of the drum or the backplate.
Also, read
- Checking and renewing brake cables
- Difference between Drum Brake and Disc Brake
- What is Brake Booster? How Brake Booster Works?
- How Hydraulic Brake Works?
- DISC BRAKES: CONSTRUCTION, WORKING PRINCIPLE, TYPES, AND ROTOR MATERIALS
- AIR BRAKE SYSTEM: COMPONENTS, WORKING PRINCIPLE, AND APPLICATIONS

5 Comments