Introduction:
Setting the correct gap for your spark plugs is a crucial step in maintaining optimal engine performance. A properly gapped spark plug ensures efficient combustion, which leads to better fuel economy, smoother engine operation, and improved overall power.
In this article, we will provide you with a detailed step-by-step guide on how to set the gaps in spark plugs.
Read More:
Tools Required:
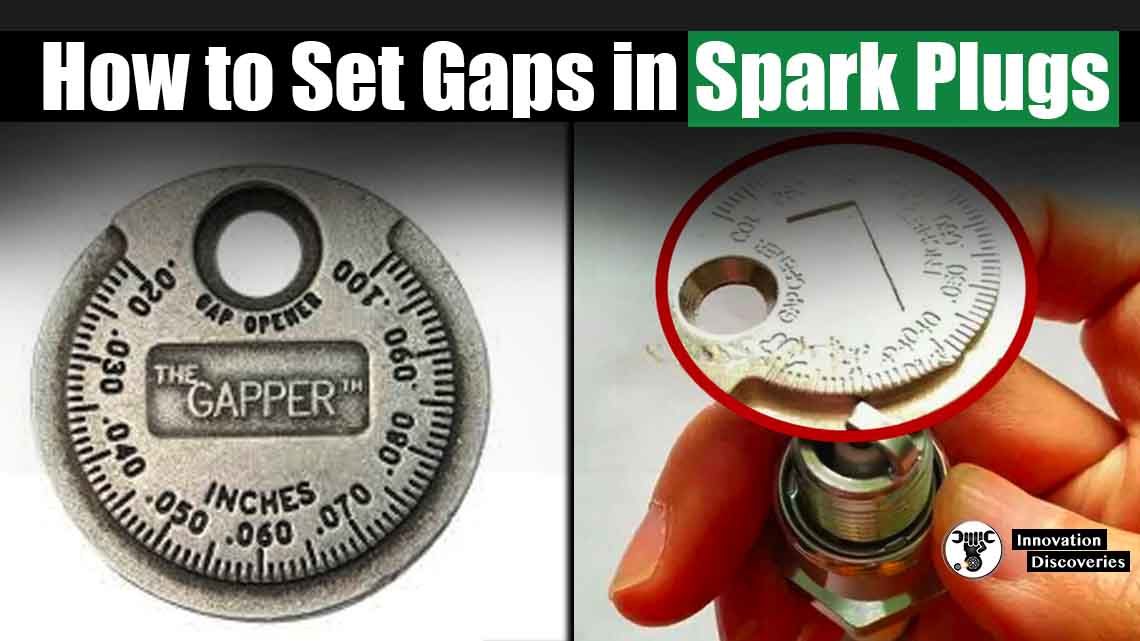
- Spark plug gap tool (coin-shaped tool for adjusting the gap)
- Owner’s manual or manufacturer’s specifications (to determine the correct gap size)
Steps
1: Gather the necessary tools Before you begin, make sure you have the required tools at hand. You’ll need a spark plug gap tool, which can be easily purchased at an automotive store or online.
Additionally, refer to your vehicle’s owner’s manual or the manufacturer’s specifications to determine the correct gap size for your specific make and model.
2: Inspect the spark plug Before adjusting the gap, carefully examine the spark plug for any signs of damage or excessive wear. Look for cracks in the insulator or heavily worn electrodes.
If you notice any abnormalities, it’s advisable to replace the spark plug altogether.
3: Prepare the spark plug If you are installing new spark plugs, they usually come pre-gapped from the manufacturer. However, it’s still a good practice to check and adjust the gap if necessary.
For existing spark plugs, it’s highly likely that the gap has changed due to wear or damage and will require adjustment.
4: Use the spark plug gap tool Take the spark plug gap tool and locate the wire or flat edge that matches your desired gap size.
The tool typically has measurements in both inches and millimeters. Ensure that you are using the correct side of the tool for your preferred unit of measurement.
5: Adjust the gap Insert the spark plug into the gap tool with the electrode side facing down. Carefully manipulate the electrode by gently moving it in or out to adjust the gap until it matches the desired measurement.
Be cautious not to apply excessive force or bend the electrodes, as this can damage the spark plug.
6: Verify the gap After adjusting the gap, remove the spark plug from the gap tool and double-check the measurement to ensure its accuracy.
If needed, make any further adjustments until the gap is correctly set.
7: Repeat for all spark plugs Repeat the above steps for each spark plug in your engine.
Remember that different cylinders may require different gap sizes, so adjust the gaps individually based on the manufacturer’s recommendations.
8: Install the spark plugs Once you have set the gaps for all the spark plugs, it’s time to install them.
Follow the manufacturer’s instructions for correctly torquing the spark plugs and reconnecting any electrical connections.
Conclusion:
Setting the gaps in spark plugs is a relatively straightforward process that plays a vital role in maintaining your engine’s performance.
By following this step-by-step guide, you can ensure that your spark plugs are correctly gapped, promoting efficient combustion and helping to keep your engine running smoothly.
Properly gapped spark plugs contribute to improved fuel economy, increased power output, and overall better engine operation.
Remember to consult your vehicle’s owner’s manual or the manufacturer’s specifications for specific gap size recommendations.
Discover More:
Visit Forum
Visit Our Friendly Website


2 Comments