Why Is It That Important?
The valve CLEARANCE WILL CHANGE after a good period when the camshafts, valve seats, and valves wear in.
This is very common on any engine with a rocker arm setup like the Toyota 20R and 22R/RE/RET motors in Pickup trucks and 4Runners.
Valves adjustment is something nobody wants to do but, Toyota recommends they be checked every 60,000 miles.
The importance of checking and adjusting your valves resides in that if you have too much clearance it can quickly cause destruction or extreme damage to your engine.
Also if a valve is burnt and isn’t sealing properly you aren’t getting a fully sealed combustion chamber.
Sometimes valve adjustment is so out of specs, it hinders the performance of the vehicle or is extremely noisy.
Some symptoms of misadjusted valves are poor gas mileage, lack of power or excessive emissions, among others.
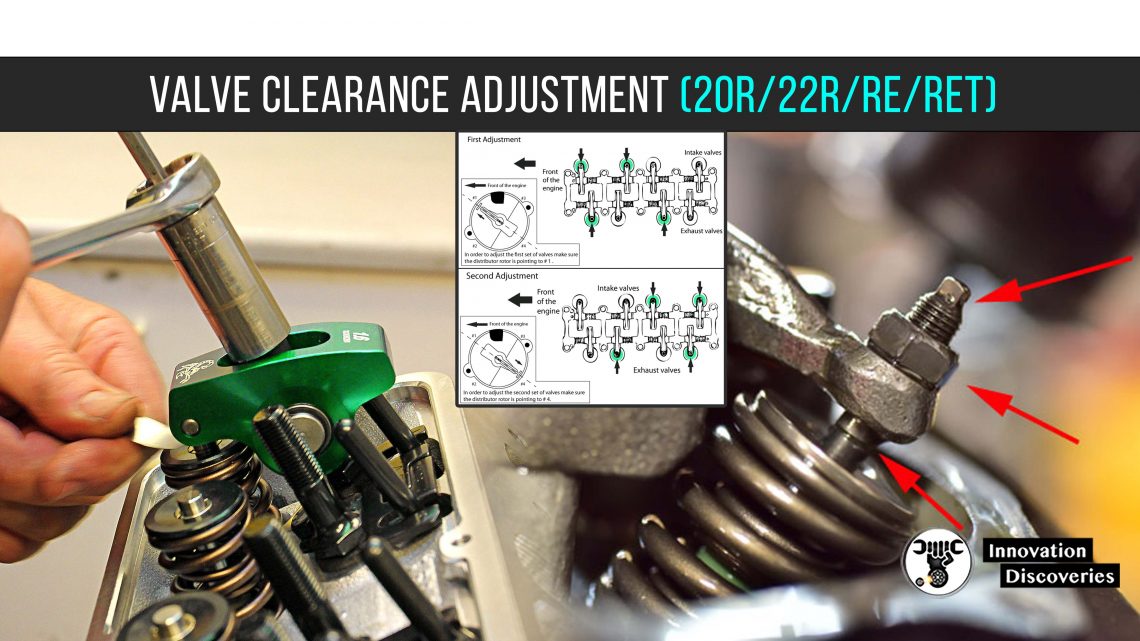
How To Adjust Your Valves?
Valve clearances:
- Intake=0.008″ (0.2mm)
- Exhaust=0.012″ (0.3mm
1. Start the engine and allow it to reach normal operating temperature (required), then shut it off.
2. Be careful because everything will be extremely hot.
3. Remove everything connected or in the way of the valve cover.
4. Remove the valve cover and distributor cap.
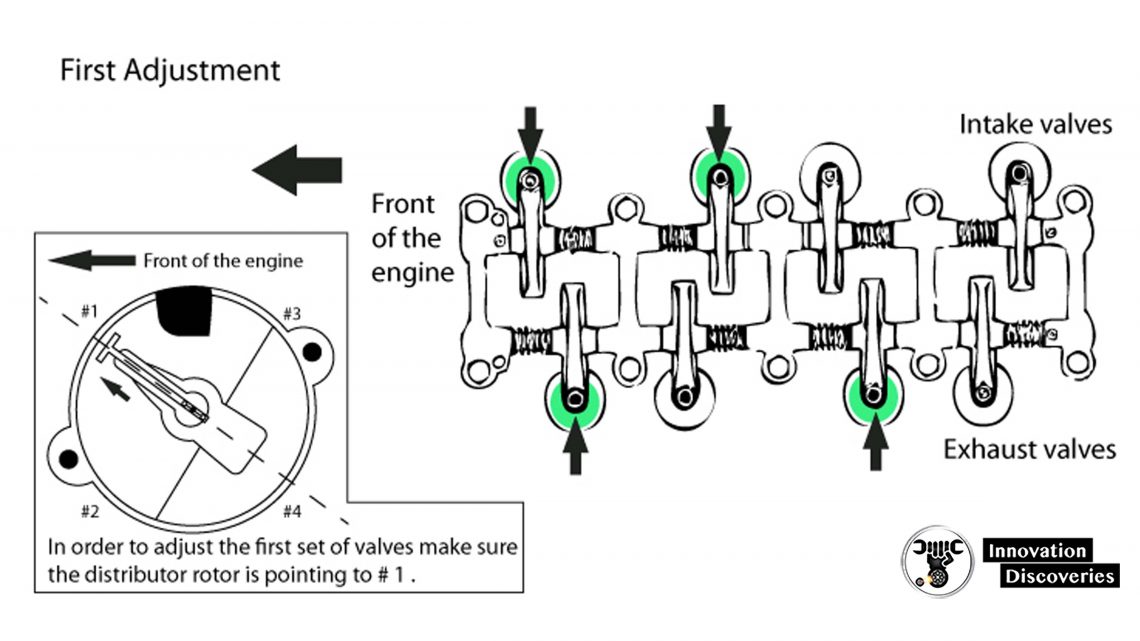
5. Position piston # 1 at TDC (Top Dead Center) on the compression stroke.
That means the balancer mark on the crankshaft pulley aligns with the 0 mark on the timing tag, at the same time the rotor on the distributor has to point at # 1, position on the distributor cap. Both intake and exhaust valves are closed.
6. Make sure the rocker arms for the # 1 cylinder valves are loose and # 4 are tight. If they are not, the # 1 piston is not at TDC on the compression stroke.
7. Check/Adjust only the valves indicated by arrows in (illustration)
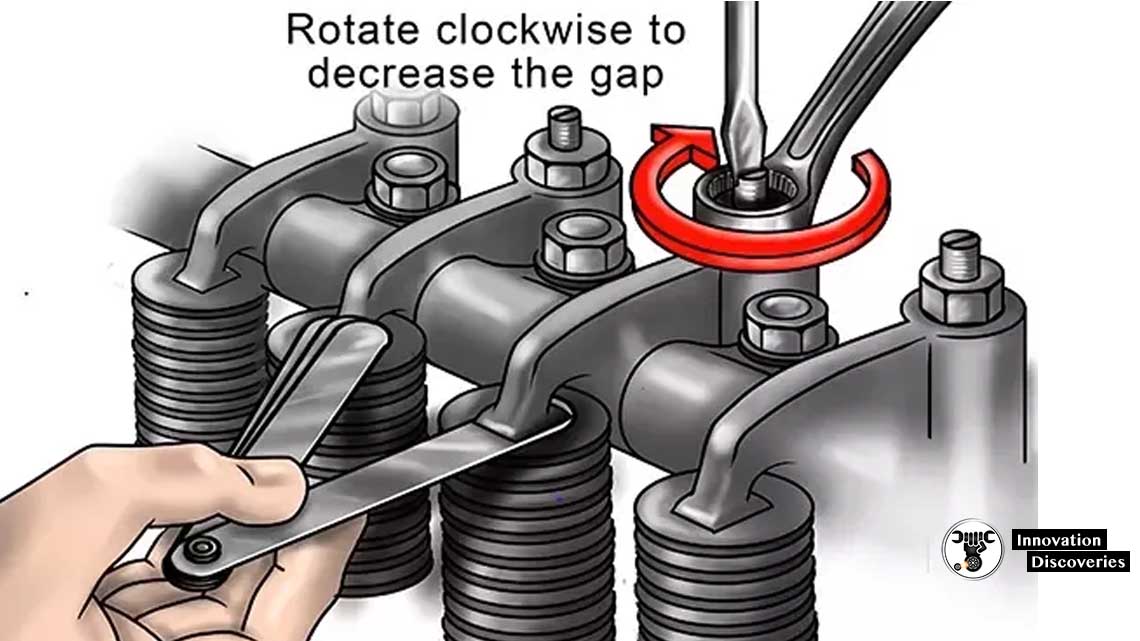
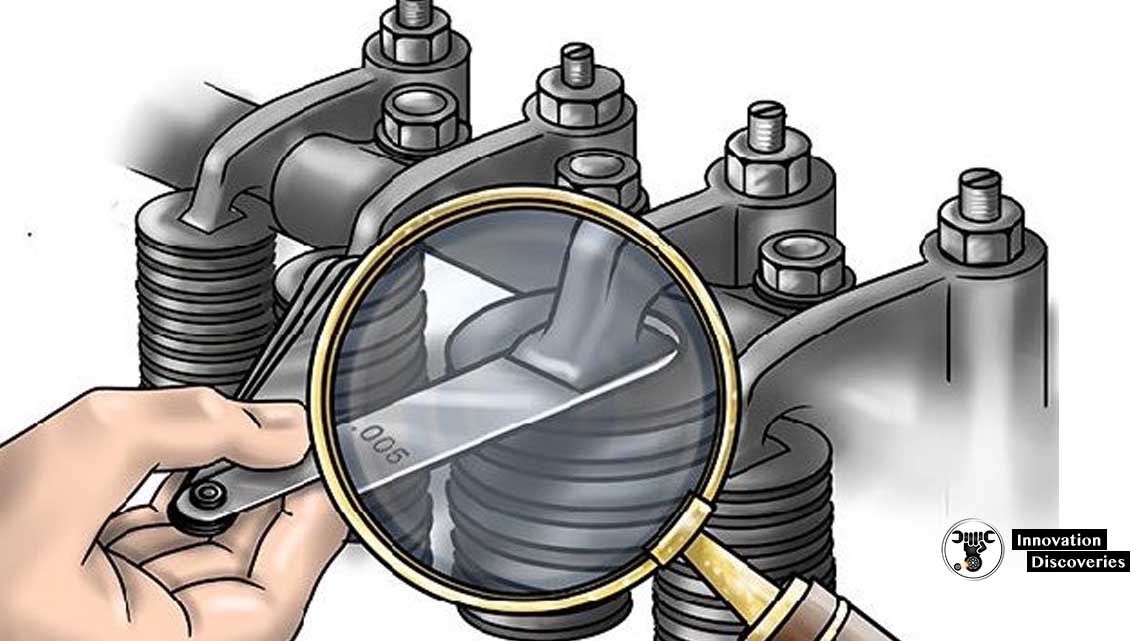
8. The clearance is measured by inserting the specified size feeler gauge between the end of the valve stem and the adjusting screw.
You should feel a slight amount of drag when the feeler gauge is moved back and forth.
9. If the gap is too large or too small, loosen the locknut and turn the adjusting screw to obtain the correct gap.
10. Once the gap has been set, hold the screw in position with a screwdriver and retighten the locknut.
Re-check the valve clearance and make sure it did not change when the locknut was being tightened. If so, re-adjust it until it is correct.
11. Repeat the procedure for the remaining valves (illustration #1), then turn the crankshaft one complete revolution (360º) and realign the notch in the pulley with zero on the timing tag.
12. Adjust the valves indicated by arrows in this second picture.
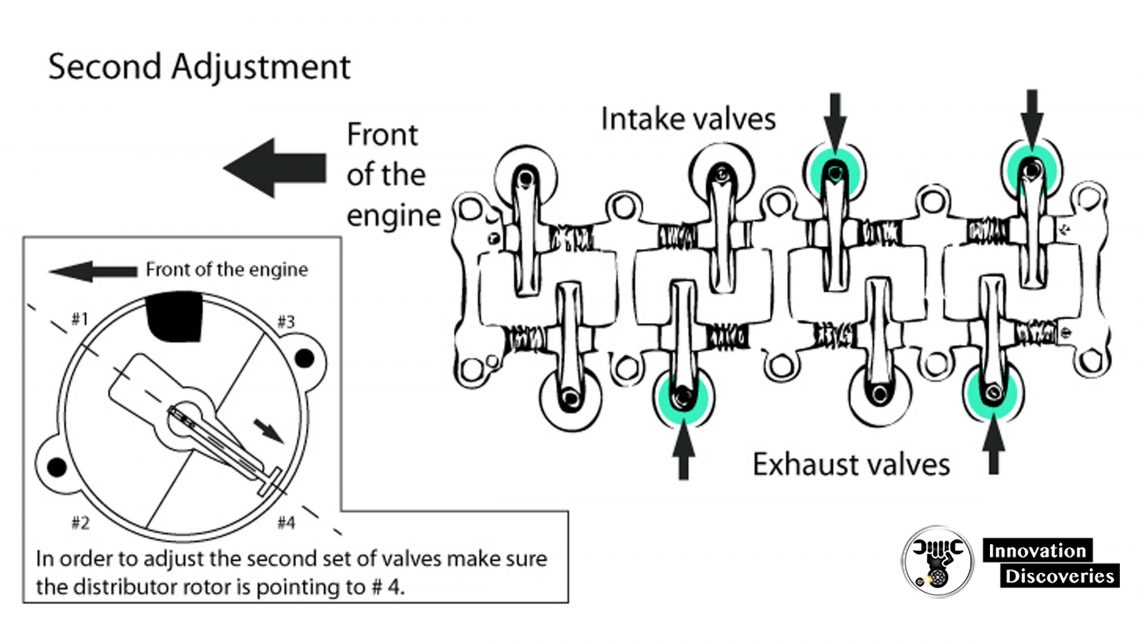
13. Re-check Valve clearances and re-adjust if necessary.
14. Reinstall the valve cover, and distributor cap and reconnect all hoses and wiring.
Valve Adjustment Tips:
- Valve clearance for aftermarket performance cams may vary. Follow cam manufacturer valve clearance specifications.
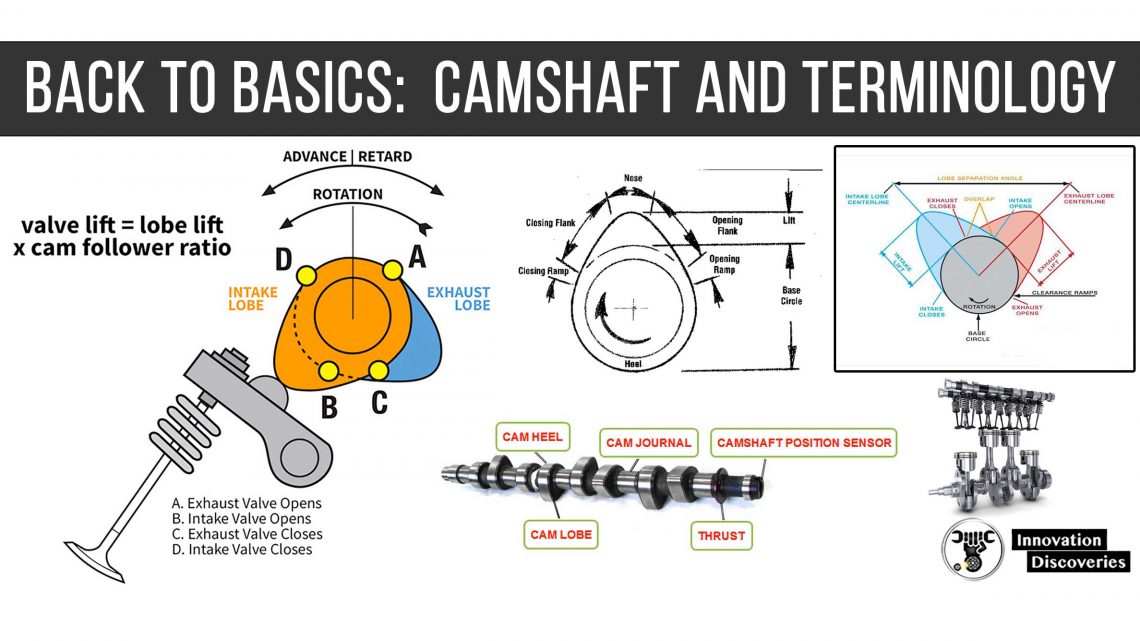
- Inspect cam lobes for abnormal wear and valve adjusting screws for flat spots and pitting. If the screws are worn, this will make your valve adjustment inaccurate.
READ MORE:
To measure Tappet Clearance Adjustment
How To Check Tappet Clearance
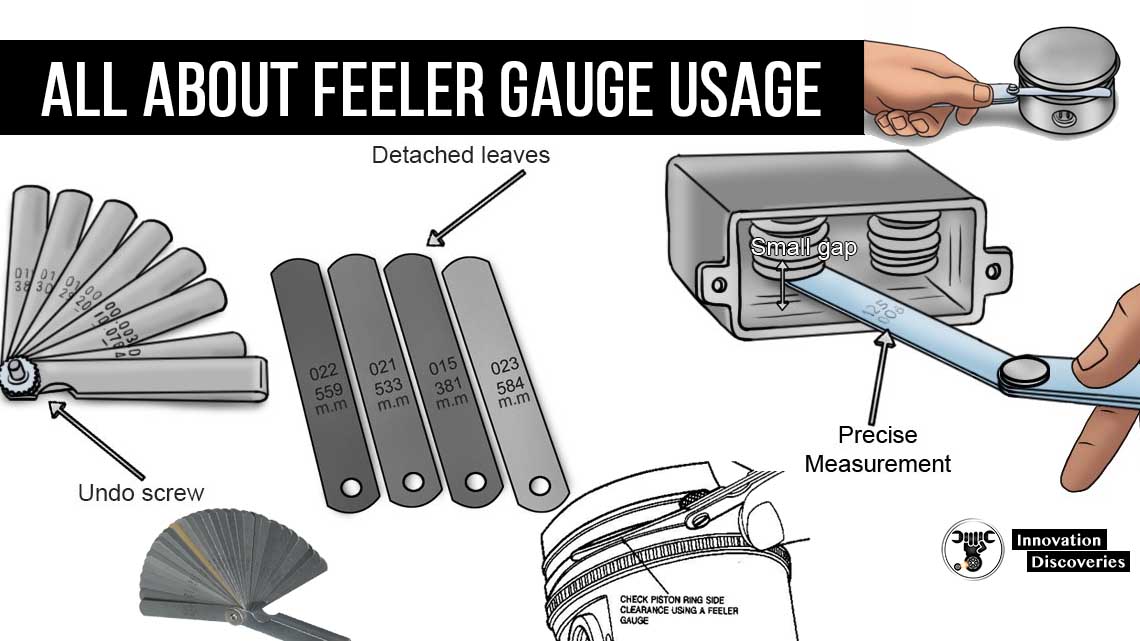
READ: All About Feeler Gauge Usage
Downloads
The following files can be downloaded by clicking on the link:
Degreeing Cam – Excel spreadsheet showing calculations to make when degreeing a cam profile.
Cam Spring – Excel spreadsheet showing how to perform simple force calculations.
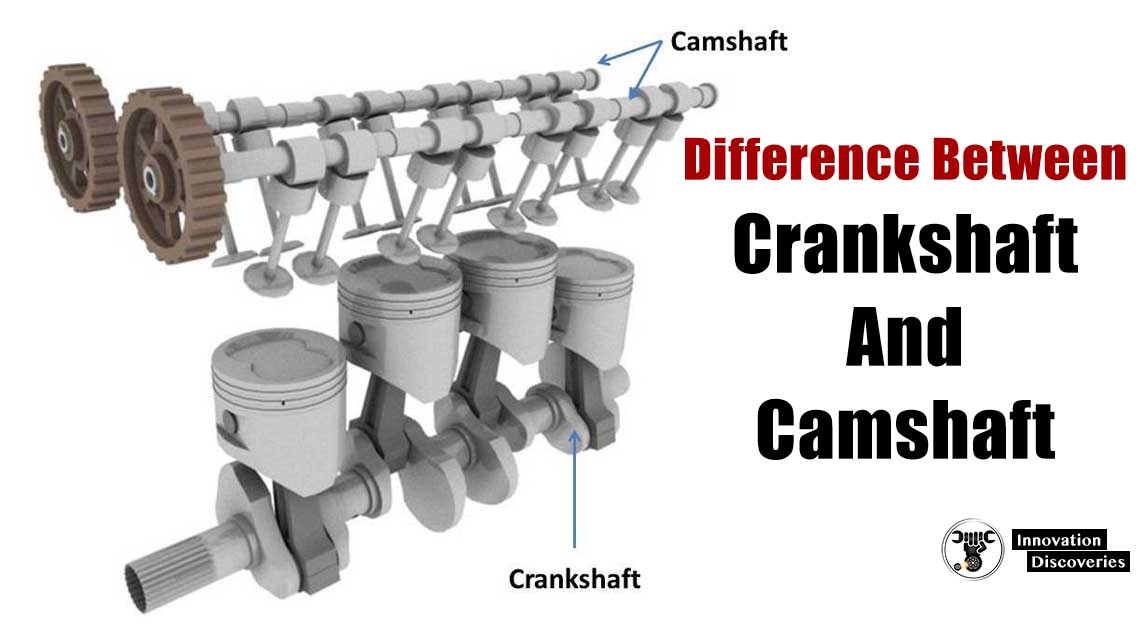
READ: Difference Between Crankshaft And Camshaft