Unlike other types of carburetor, which have fixed jets,
The SU has only one jet, so the mixture setting affects the engine throughout
Its speed ranges.
Some SUs also have exhaust emission-control devices to
Comply with anti-pollution laws.
Adjustment of these is described in adjusting an emission-control carburetor.
Before turning the carburetor,
Carry out all the checks in Checking and cleaning a SU carburetor,
And bring the engine up to normal working temperature.
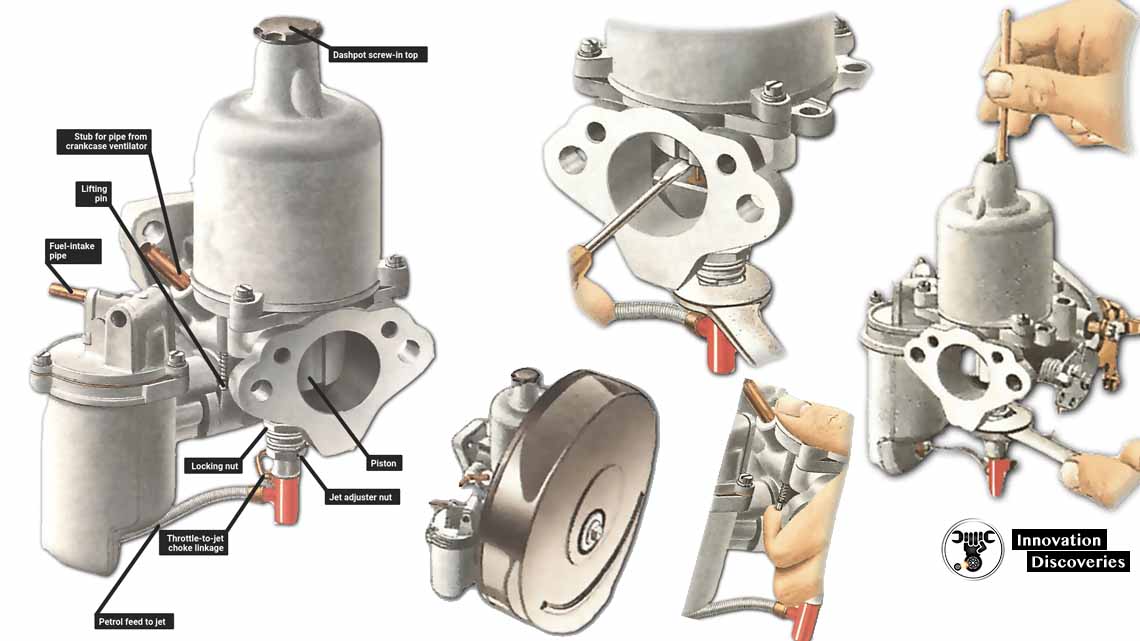
Also, check the level of oil in the dashpot
The domed piston chamber at the top of the carburetor.
SEE MORE:
- FUEL SYSTEM: COMPONENTS, WORKING PRINCIPLES, SYMPTOMS AND EMISSION CONTROLS
- How variable-jet carburetors work
The oil is there to slow the movement of the piston. The delay enriches the mixture briefly when the throttle is opened suddenly. SAE 20 engine oil is the correct grade to use when you top up.
On older SU carburetors,
Which have a vent hole in the screw-in plastic top of the dashpot,
The oil level should be I in. (13 mm) above the top of the piston tube.
On dustproof SUs, which have a hole in the dashpot neck instead of the top,
The oil should be I in. (13 mm) below the piston top.
If the engine is slow to respond to sudden throttle openings or responds fluffily,
Correcting the dashpot oil level may cure the problem,
So that you do not need to retune.
However, if correcting the oil level does not resolve the problem,
You may need to clean the carburetor before turning it.
Whenever possible,
Make adjustments with the air cleaner in place removing it alters the
Partial vacuum inside the carburetor.
On cars where the carburetor is not very accessible,
You may have to remove the air cleaner to reach some parts,
Then carry out further fine adjustments to obtain the correct engine running later on.
A SU carburetor
It needs a periodic check to see if it is in tune.
Air cleaner
But leave it on if possible.
Checking the mixture
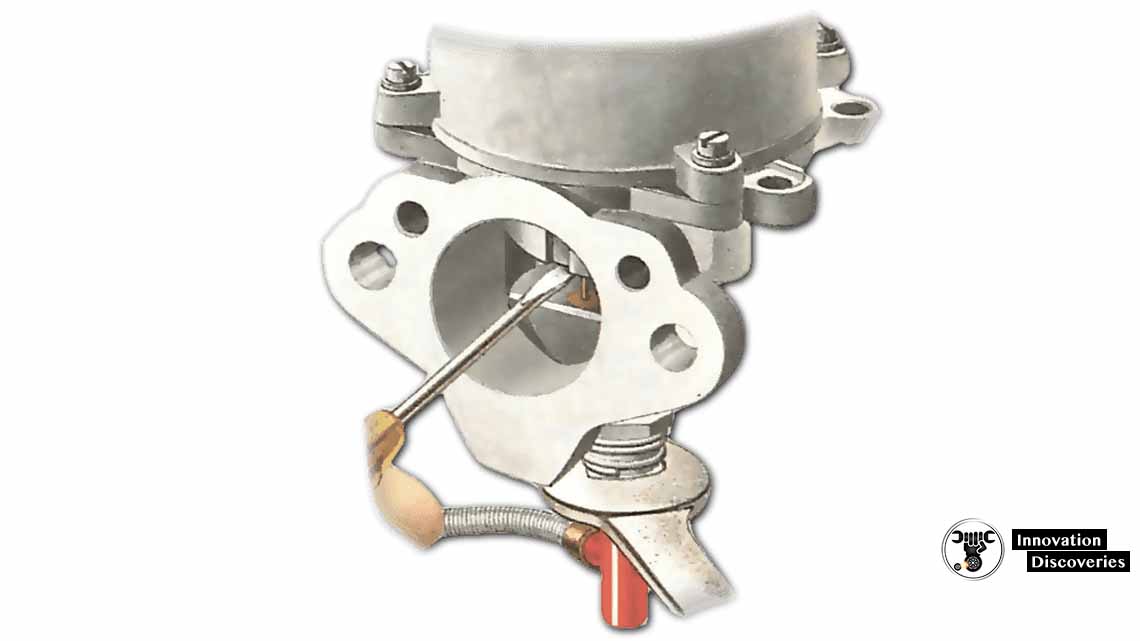
Use the piston lifting pin at the side of the carburetor to check the fuel-air mixture.
With the engine running at working temperature,
Hook your finger under the pin and raise the piston about 1/32in. (1 mm).
If, while the piston is raised,
The engine speed increases briefly then returns to normal,
The mixture is correct. If it rises and stays high, the mixture is too rich. If it falls and the engine tends to die, the mixture is too weak.
To correct the mixture,
Move the jet adjuster nut one hexagon flat at a time.
Screwing it up – anti-clockwise as seen from above – makes the mixture weaker.
Screwing it down – clockwise makes the mixture richer.
Each time you move the adjuster, wait for about ten seconds,
Then check again with the lifting pin to see whether the mixture is now right.
Take care that the engine temperature does not rise above normal
Which it will if you take too long.
Such a rise will result in a false,
Overweak mixture setting which will show when the
Temperature returns to normal.
Before and after adjustment, check that the jet needle is central in the jet.
Stop the engine, use the damper to lift the piston to the top of its travel and let it drop.
It should fall smoothly with a sharp click. If it does not, the jet is out of line and you must centralize it.
An off-centre jet may also score or bend the tapered needle. Do not attempt to clean up or straighten a badly scored or bent needle. It must be replaced.
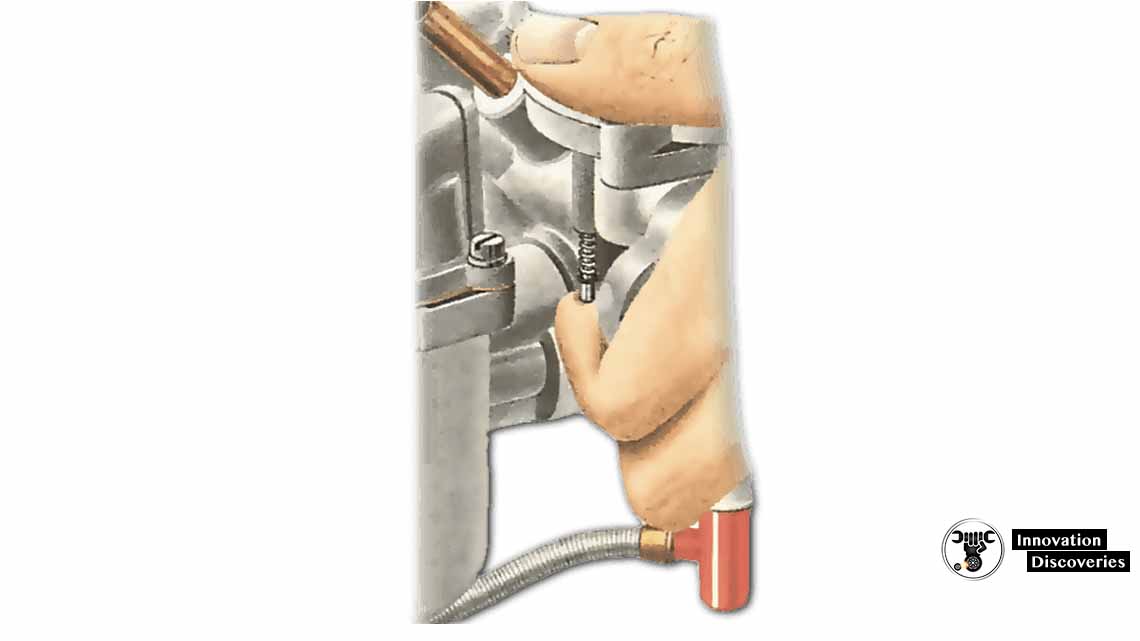
Centralizing the jet
The jet should be screwed up as high as the bridge if possible.
Remove the air cleaner and the dashpot screw-in top and damper. Use a screwdriver to raise the piston.
Turn the jet adjuster nut up as far as it will go,
Or until the jet is level with the bridge inside the carburetor.
Slacken the large locking nut above the adjuster nut on the jet where it enters the carburetor body.

Now use a pencil or soft metal rod, such as a stick of solder,
To push the piston right down. Hold it down and tighten the locking nut.
Check that the piston drops with a click – if it does not,
Repeat the centralizing process.
Screw the jet adjuster nut down two full turns,
Which should bring it near enough to the correct setting for the engine to be able to run.
Also, read – Car Talk | Driving Tips | Maintenance Tips
4 Comments