Introduction:
Lead acid batteries are the workhorses of the automotive industry, providing the necessary power to start engines and run electrical systems.
However, over time, these batteries can lose their efficiency and capacity due to factors such as sulfation, grid corrosion, and electrolyte loss. Instead of immediately replacing them, understanding how to repair lead acid batteries can save both money and resources.
In this guide, we’ll delve into the process of repairing vehicle lead acid batteries step by step.
Understanding Lead Acid Batteries:
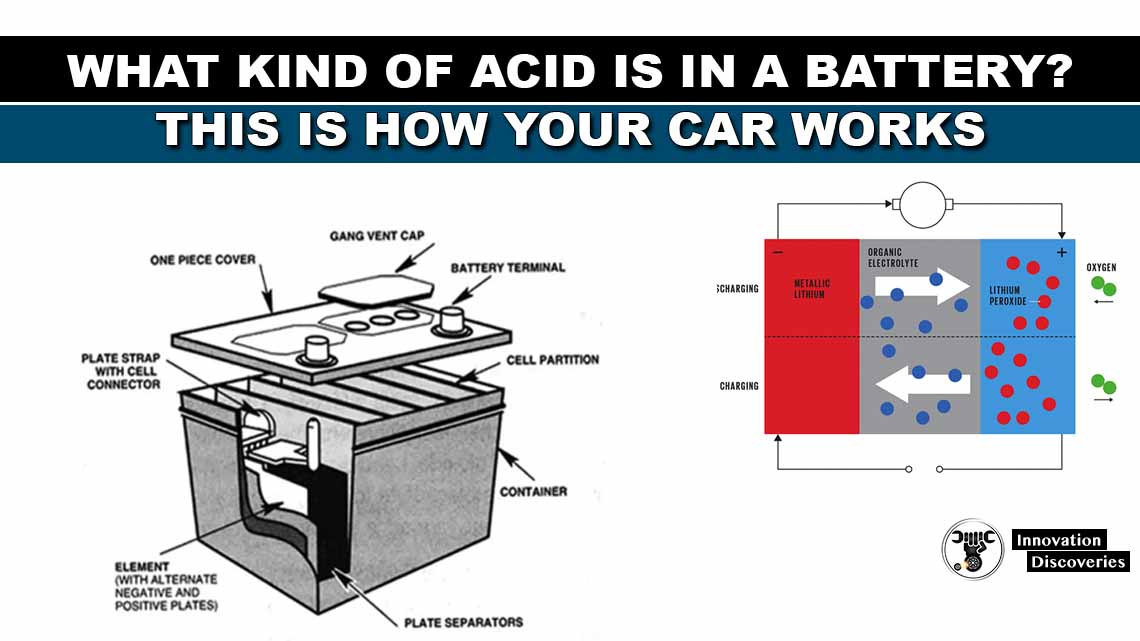
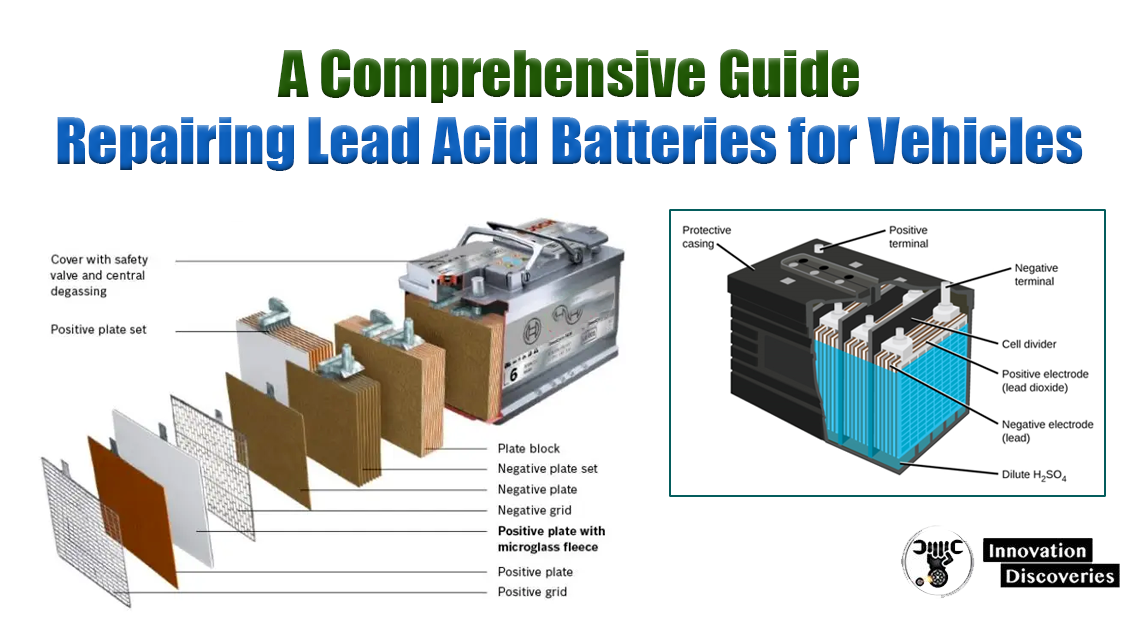
Before diving into the repair process, it’s essential to grasp the fundamentals of lead acid batteries. These batteries consist of lead dioxide plates (positive) and sponge lead plates (negative) immersed in sulfuric acid electrolyte.
During discharge, lead sulfate forms on the plates, which can lead to sulfation over time, reducing battery capacity.
Tools and Materials Needed:
- Safety gear: Gloves, goggles, and apron to protect against acid spills.
- Battery hydrometer: For measuring specific gravity.
- Battery charger: To facilitate the reconditioning process.
- Distilled water: For refilling electrolyte levels.
- Epsom salt: Magnesium sulfate helps dissolve sulfate deposits.
- Baking soda: For neutralizing spilled acid.
- Funnel and syringe: For adding water and Epsom salt solution to the cells.
- Voltmeter: To check voltage levels.
- Battery terminal cleaner: For removing corrosion.
Step-by-Step Repair Process:
1. Safety First:
Before starting any work on the battery, ensure you’re wearing appropriate safety gear to protect against acid spills and fumes.
2. Preparation:
Park the vehicle in a well-ventilated area and turn off the engine. Open the hood and locate the battery. Disconnect the negative (-) terminal first, followed by the positive (+) terminal.
3. Assessment:
Inspect the battery for visible signs of damage such as cracks, leaks, or bulging. If the battery is severely damaged, it might be safer to replace it entirely.
4. Cleaning:
Use a battery terminal cleaner to remove any corrosion from the terminals and cable ends. Clean the exterior of the battery with a solution of baking soda and water to neutralize any acid residue.
5. Testing:
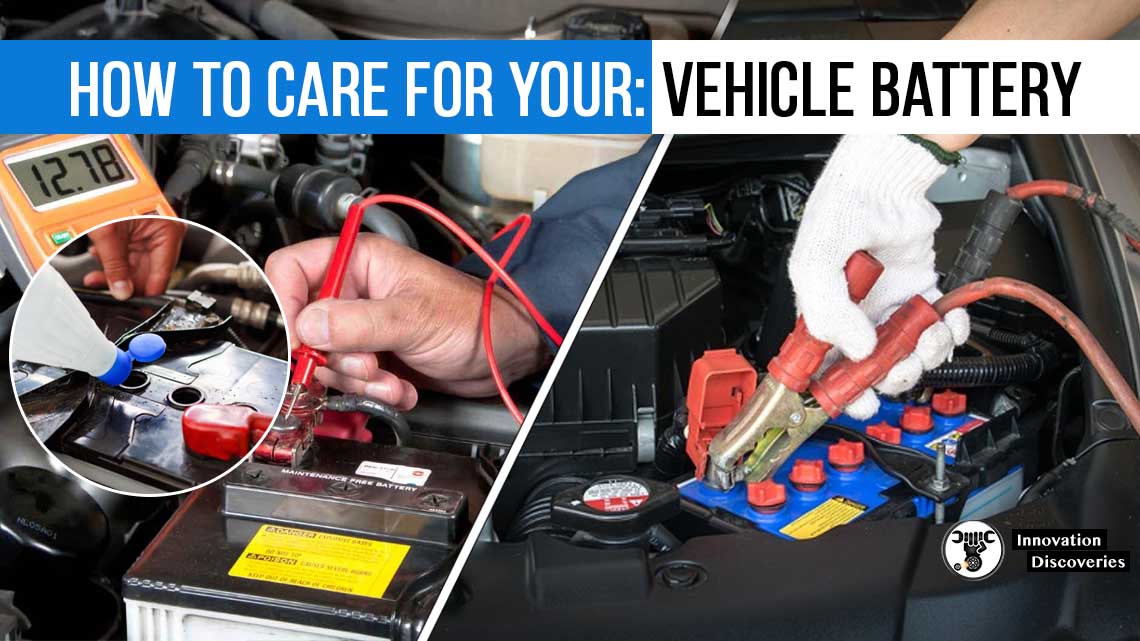
Use a voltmeter to check the voltage of the battery. A healthy lead acid battery should have a voltage of around 12.6 volts when fully charged.
If the voltage is significantly lower, the battery may need reconditioning.
6. Refilling:
Check the electrolyte levels in each cell using a hydrometer. If the levels are low, carefully add distilled water to bring them up to the appropriate level. Be cautious not to overfill.
7. Desulfation:
Prepare an Epsom salt solution by dissolving one tablespoon of Epsom salt in warm distilled water. Carefully add the solution to each cell using a funnel and syringe.
This helps dissolve sulfate deposits on the plates.
8. Charging:
Reconnect the battery terminals and connect the battery charger. Select the appropriate charging mode for lead acid batteries and allow the battery to charge fully. This process can take several hours.
9. Testing Again:
After charging, use the voltmeter to check the voltage of the battery. It should now read closer to 12.6 volts if the repair was successful.
10. Maintenance:
Regular maintenance, including keeping the battery terminals clean and checking electrolyte levels, can prolong the life of the repaired battery.
Conclusion:
Repairing lead acid batteries for vehicles is a cost-effective and environmentally friendly alternative to replacing them.
By following the step-by-step process outlined in this guide and taking proper safety precautions, you can extend the life of your battery and keep your vehicle running smoothly.
Remember to perform regular maintenance to ensure optimal performance and longevity.
Discover More:
Read: WHAT KIND OF ACID IS IN A BATTERY? THIS IS HOW YOUR CAR WORKS
Read: HOW LONG DO ELECTRIC CAR BATTERIES LAST?
READ: CAR ALTERNATOR FUNCTIONS AND SYMPTOMS OF FAILURE
Visit Forum
Visit Our Friendly Website


