Introduction
Piston ring gap clocking is a fundamental step in engine assembly, often overlooked but crucial for optimal engine performance.
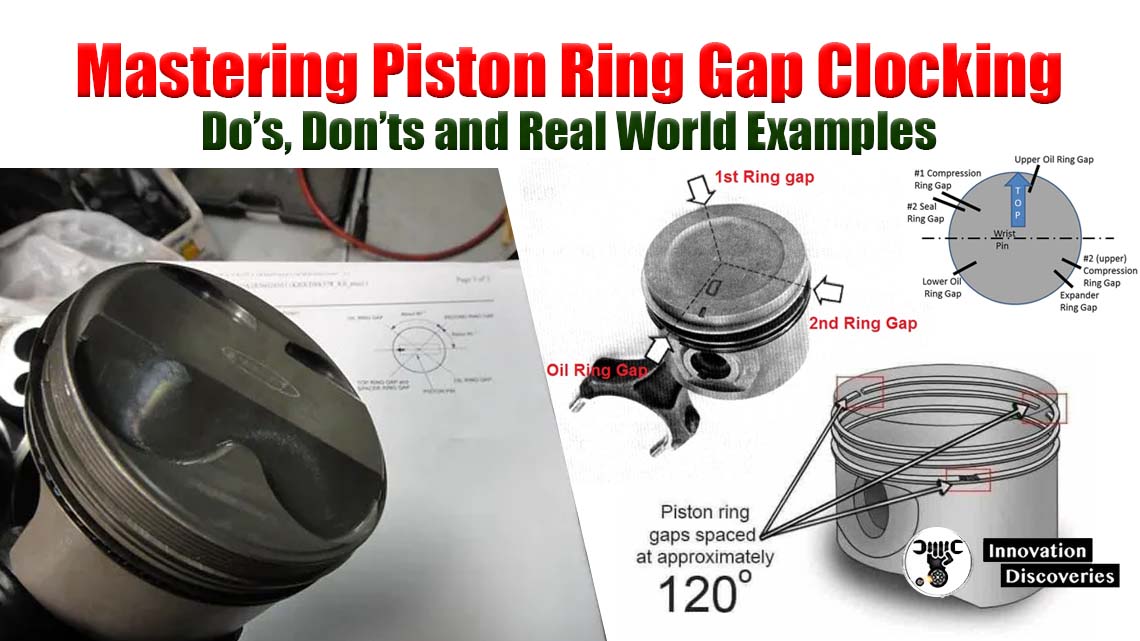
This process involves placing piston rings in a specific orientation to ensure proper combustion, reduce oil consumption, and minimize blow-by.
In this article, we’ll delve into the ins and outs of piston ring gap clocking, highlighting the do’s and don’ts, along with real-world examples for a comprehensive understanding.
Understanding Piston Ring Gap Clocking
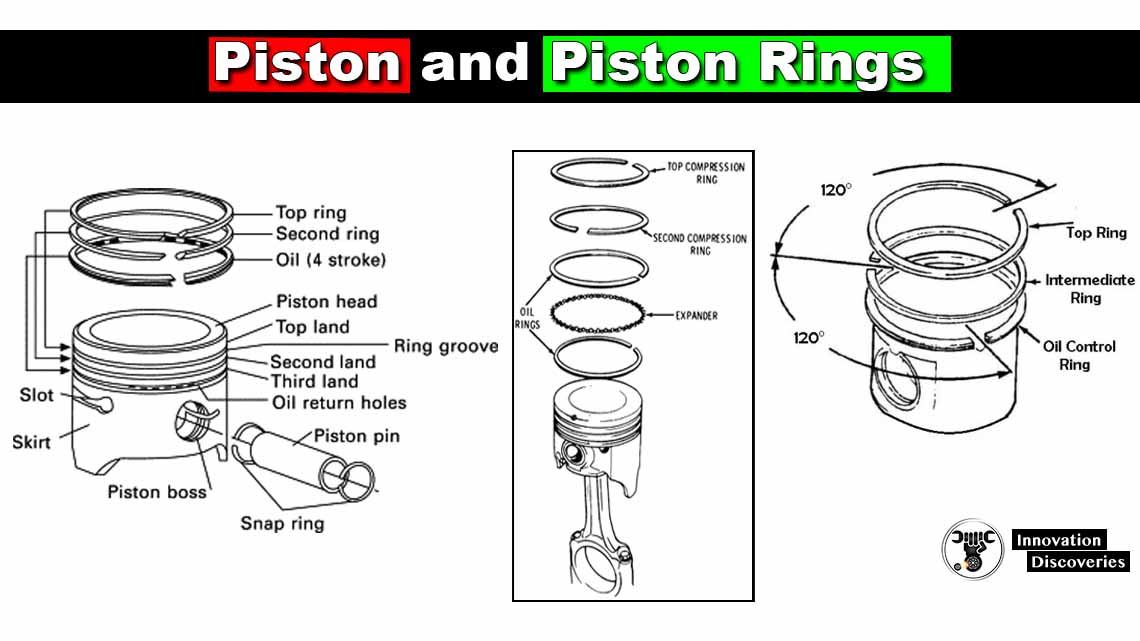
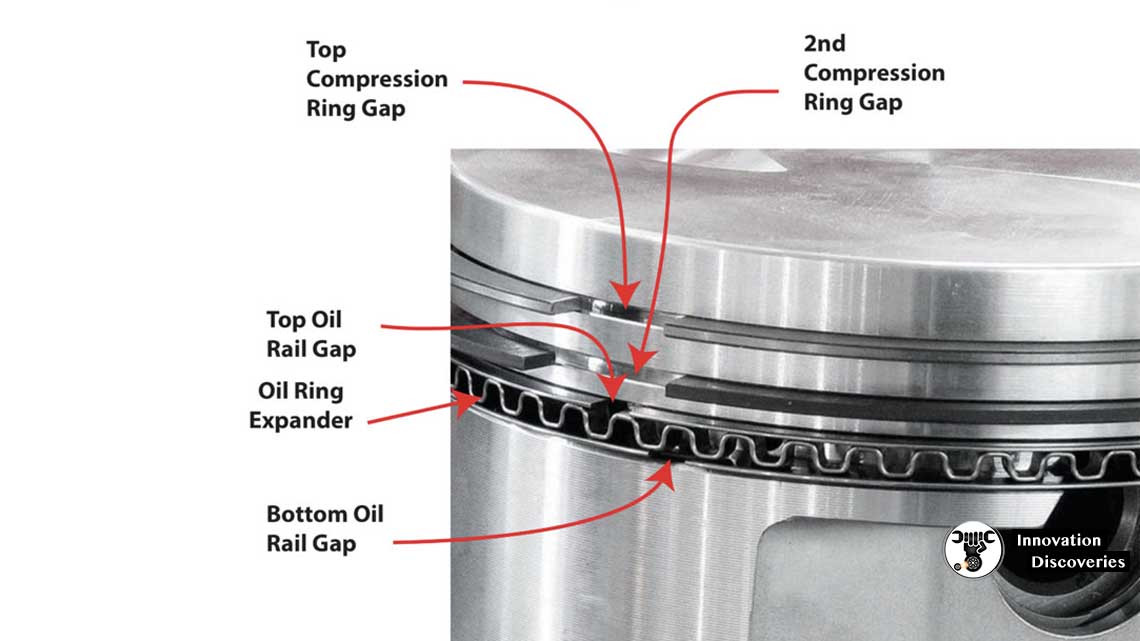
Piston rings are designed with small gaps where they meet. This enables them to expand and contract, ensuring a snug fit against the cylinder wall.
The orientation of these gaps is vital to prevent blow-by and oil consumption, and it’s important to follow manufacturer guidelines for each specific engine.
The Do’s of Piston Ring Gap Clocking
1. Follow Manufacturer’s Guidelines:
Always adhere to the engine manufacturer’s specifications and guidelines. Each engine may have unique recommendations regarding ring gap orientation.
2. Ensure Even Spacing:
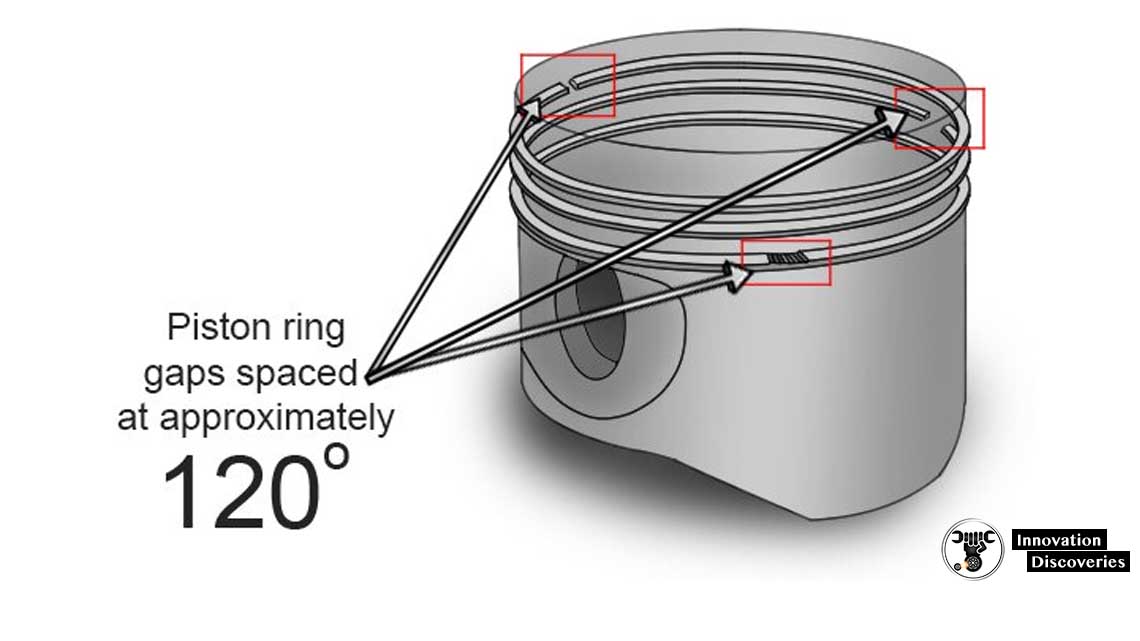
When working with multiple rings, space the gaps evenly around the circumference of the piston. This promotes even distribution of stress and heat.
3. Stagger Ring Gaps:
For engines with multiple rings, stagger the ring gaps. This technique aids in preventing gas leakage and enhances the seal.
4. Check Ring Markings:
Some rings may have markings indicating the top side. Always ensure these markings face upwards during installation.
5. Maintain Clean Surfaces:
Before assembly, thoroughly clean both the cylinder bore and the rings to ensure a proper seal.
The Don’ts of Piston Ring Gap Clocking
1. Avoid Overlapping Gaps:
Never position the gaps of two rings directly on top of each other. This can lead to increased blow-by and decreased performance.
2. Steer Clear of Incorrect Clocking:
Randomly placing rings can lead to suboptimal engine performance. Always follow the manufacturer’s guidelines.
3. No Forceful Installation:
Refrain from forcing rings into the piston grooves. This can result in damage to both the ring and the piston.
Real-World Examples
Example 1 – Ford 5.0L Coyote Engine:
- Do: Place the ring gaps at the 12 o’clock position for the top compression ring and the 6 o’clock position for the second compression ring.
- Don’t: Avoid placing the ring gaps at 3 and 9 o’clock positions to prevent increased blow-by.
Example 2 – Chevrolet Small Block 350:
- Do: Install the top compression ring with the marking facing up, as indicated by manufacturer guidelines.
- Don’t: Never overlap the ring gaps, especially the top compression ring.
Example 3 – Honda K-Series:
- Do: Stagger the gaps of the top and second compression rings by at least 120 degrees. Similarly, stagger the oil control ring gaps.
- Don’t: Avoid aligning the gaps of all three rings in a straight line.
Conclusion
Mastering piston ring gap clocking is essential for achieving peak engine performance and longevity. Always refer to the manufacturer’s guidelines and meticulously follow the specific recommendations for the engine at hand.
By adhering to these principles, you’ll ensure optimal combustion, minimize oil consumption, and prevent blow-by, ultimately leading to a more efficient and reliable engine.
Discover More:
Discover More:
Read More:
PISTON AND PISTON RINGS
3 SYMPTOMS OF BAD VALVE SEALS AND PISTON RINGS AND REPLACEMENT COST
WHAT IS PISTON CLEARANCE? AND WHY IT IS NECESSARY?
Read More:
For More Knowledge

Visit Forum
Visit Our Friendly Website


