Introduction
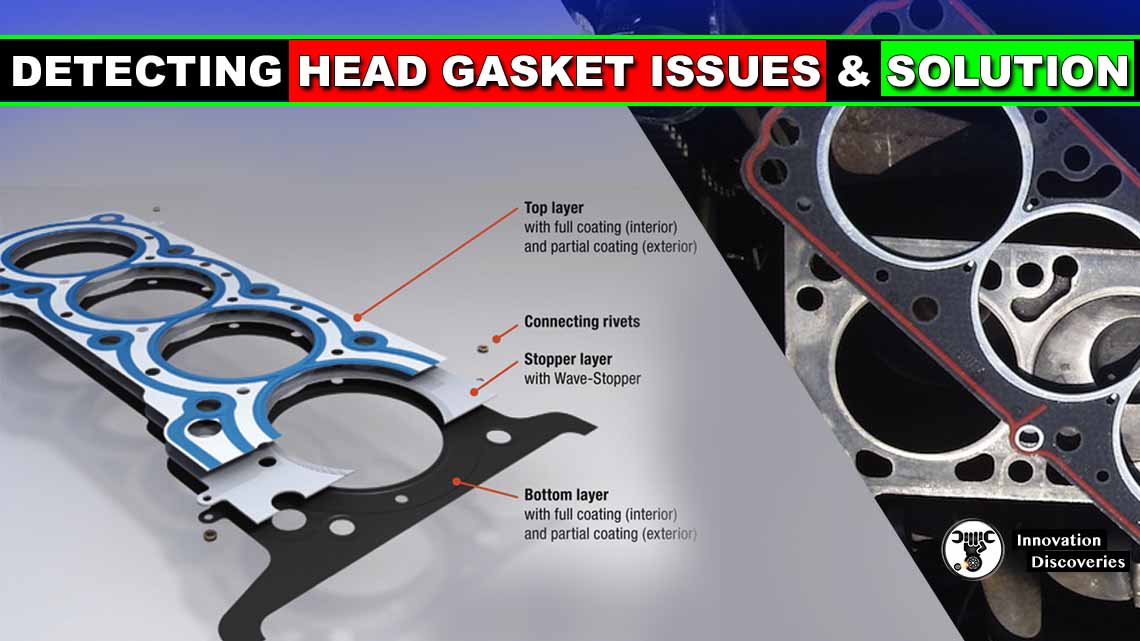
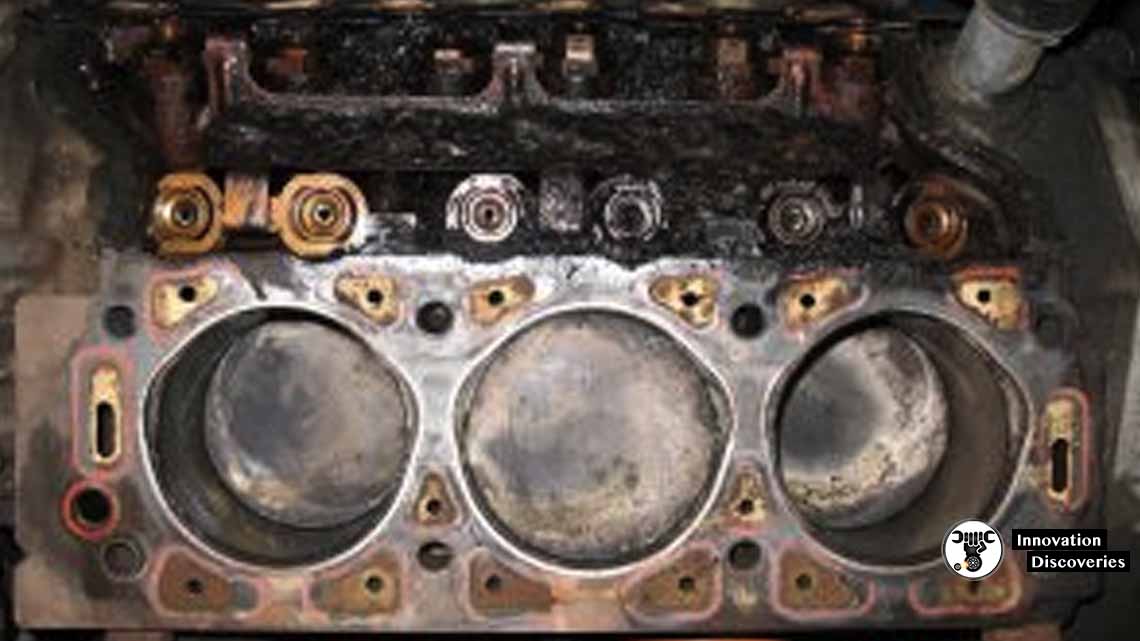
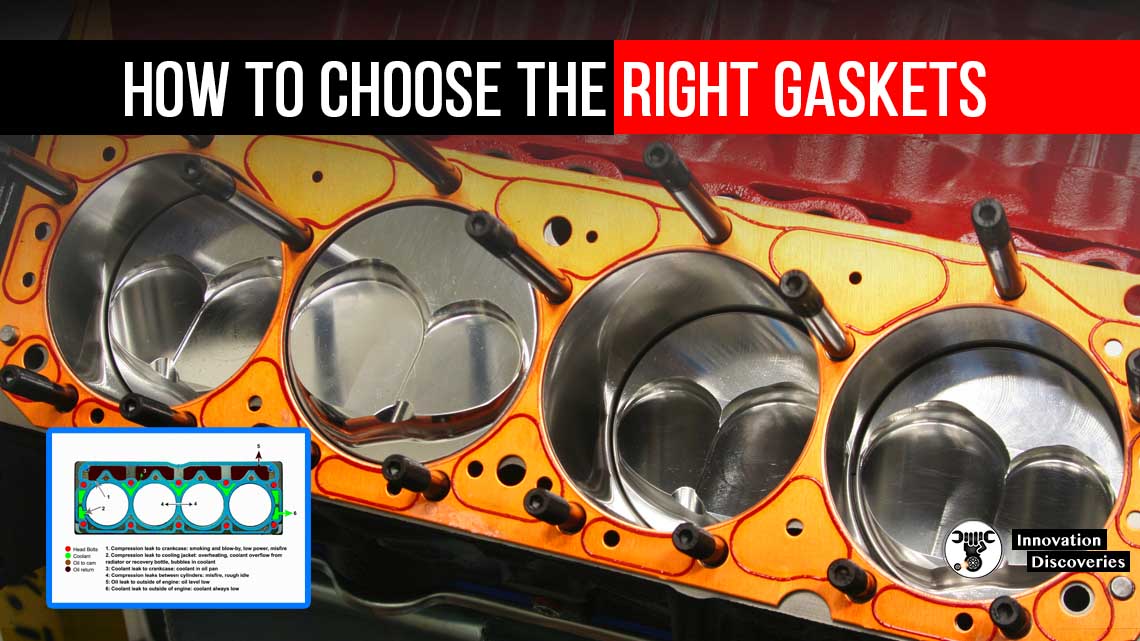
The head gasket is a critical component of any combustion engine, forming a seal between the engine block and the cylinder head. When this vital seal fails, it can lead to a host of problems ranging from coolant and oil leaks to engine overheating and loss of power.
Recognizing the signs of a failing head gasket early on can save you from costly repairs and potential engine damage.
Let’s delve into the common issues associated with head gasket failure and the steps involved in resolving them.
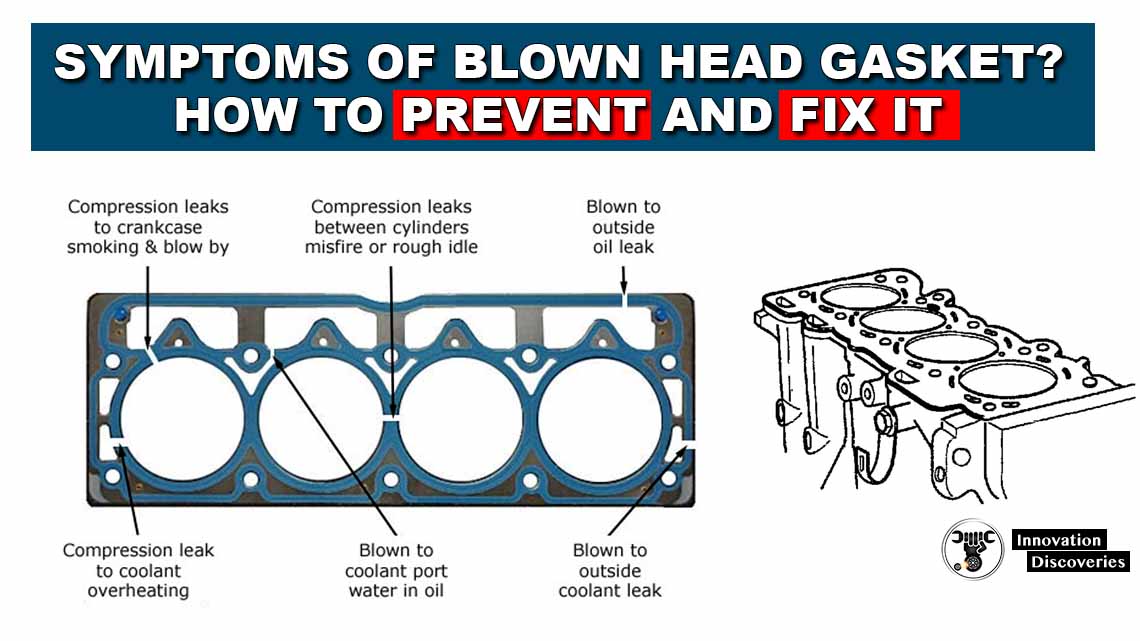
Also, read – Symptoms Of A Blown Head Gasket? How To Prevent And Fix It
Issues With Head Gasket
1. Coolant Consumption
Coolant, also known as antifreeze, plays a crucial role in maintaining the optimal operating temperature of an engine.
It circulates through the engine block and cylinder head, absorbing heat generated during combustion and dissipating it through the radiator.
However, if you find yourself frequently replenishing the coolant reservoir without any noticeable leaks, it could be a sign of a failing head gasket.
Understanding Coolant Consumption:
1. Normal vs. Abnormal Consumption:
Under normal circumstances, a vehicle’s coolant level remains relatively stable over time.
However, if you notice a gradual decrease in coolant level or the need for frequent top-ups, it suggests an underlying issue.
2. Internal Leakage:
A common cause of coolant consumption is the breach of the head gasket, which forms a seal between the engine block and cylinder head.
When this seal fails, coolant may leak into the combustion chamber, where it gets burned along with the fuel during the combustion process.
3. Signs of Coolant Consumption:
Keep an eye out for symptoms such as white exhaust smoke, a sweet smell emanating from the exhaust, or overheating.
These are indicative of coolant entering the combustion chamber and being vaporized along with the fuel.
Diagnosing Coolant Consumption:
1. Coolant Leak Test:
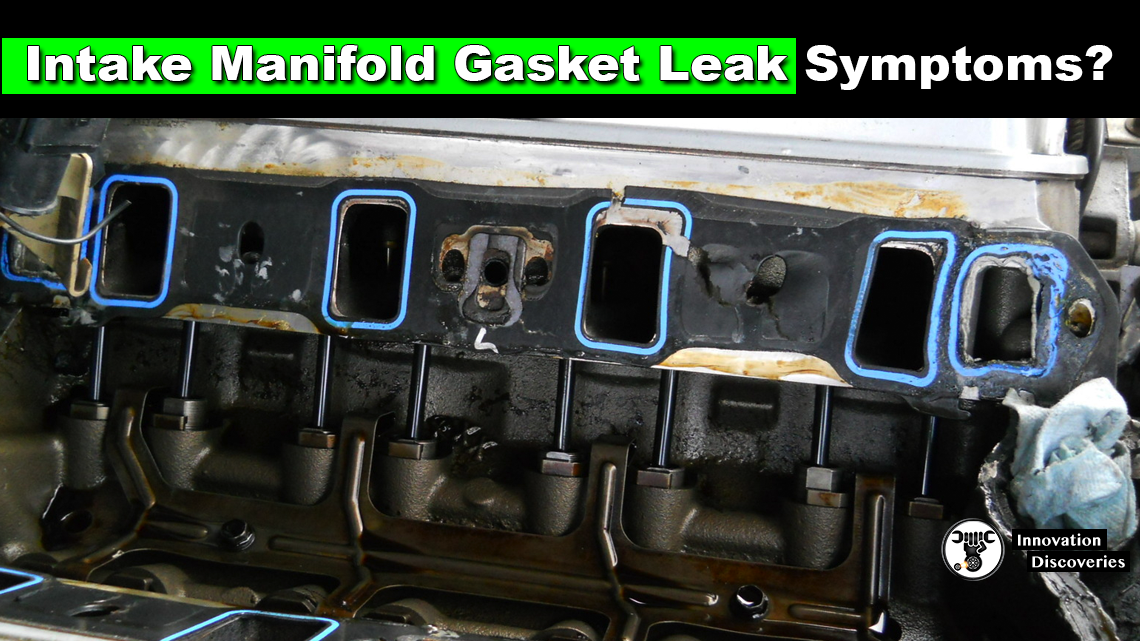
Conduct a visual inspection of the engine bay, paying close attention to areas around the cylinder head and intake manifold for any signs of coolant leaks. Additionally, check the condition of the coolant hoses and radiator for potential leaks.
2. Compression Test:
A compression test can help identify if there’s a leak between the combustion chamber and cooling system. A significant drop in compression pressure across one or more cylinders may indicate a compromised head gasket.
3. Cooling System Pressure Test:
Pressurizing the cooling system with a pressure tester can reveal hidden leaks that may not be visible during a visual inspection. If the pressure drops rapidly, it suggests a leak in the system.
Solution:
If you suspect a head gasket issue based on coolant consumption, it’s essential to address it promptly to prevent further damage to the engine.
The solution typically involves replacing the faulty head gasket with a new one.
However, it’s crucial to thoroughly inspect the cylinder head and engine block for any signs of damage or warping that may compromise the effectiveness of the new gasket.
Conclusion:
Coolant consumption is a common symptom of head gasket failure, indicating a breach in the seal between the engine block and cylinder head.
By understanding the signs and causes of coolant consumption and performing diagnostic tests, you can identify head gasket issues early on and take appropriate measures to rectify them, ensuring the continued performance and reliability of your vehicle’s engine.
2. Oil Consumption
Engine oil serves as the lifeblood of a vehicle, lubricating moving parts and reducing friction to ensure smooth operation.
However, if you notice a significant decrease in oil level between oil changes or the need for frequent top-ups, it could be indicative of a potential head gasket issue.
Understanding Oil Consumption:
1. Normal vs. Abnormal Consumption:
While some oil consumption is considered normal as engines age, excessive or sudden oil loss signals an underlying problem.
Monitoring oil levels regularly and noting any drastic changes can help identify issues early on.
2. Internal Leakage:
A deteriorated head gasket can create a breach between the combustion chamber and the engine’s lubrication system.
This allows oil to seep into the combustion chamber, where it gets burned along with the fuel during the combustion process.
3. Signs of Oil Consumption:
Look out for symptoms such as blue or gray smoke emanating from the exhaust, fouled spark plugs, or an oily residue in the combustion chamber.
These are indicative of oil entering the combustion chamber and being combusted.
Diagnosing Oil Consumption:
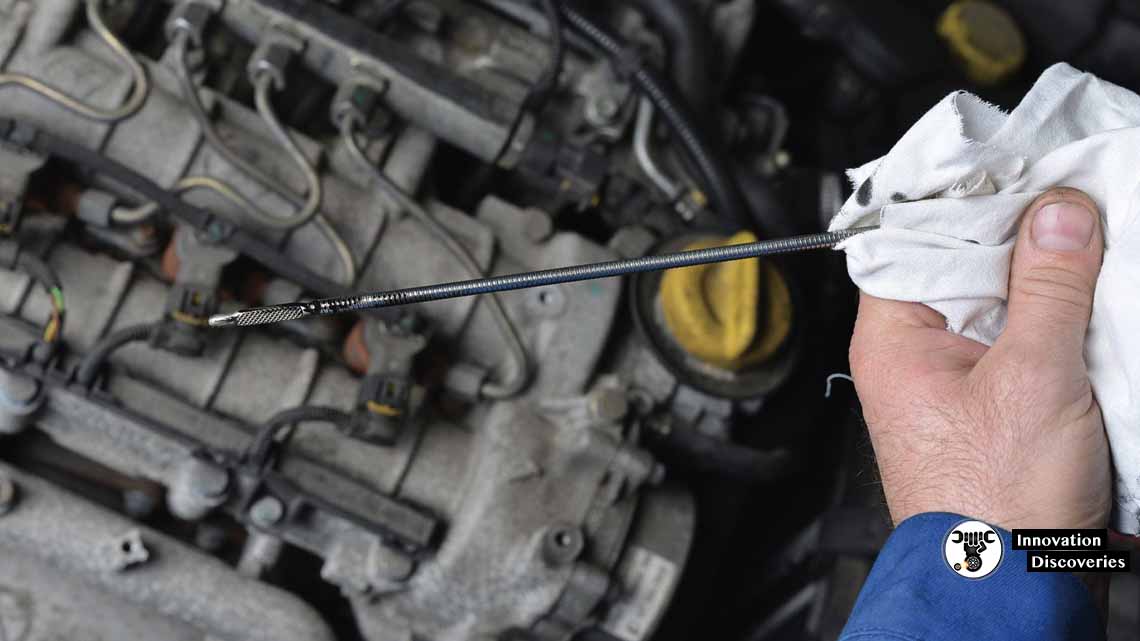
1. Visual Inspection:
Check for oil leaks around the engine, particularly near the cylinder head and valve cover gasket. Inspect the spark plugs for fouling, as excessive oil consumption can lead to their deterioration.
2. Compression Test:
Conducting a compression test can reveal if there’s a leak between the combustion chamber and crankcase.
A significant drop in compression pressure across one or more cylinders may indicate a compromised head gasket.
3. Oil Analysis:
Performing an oil analysis can provide insights into the condition of the oil and detect any contaminants or abnormal wear particles.
This can help pinpoint the source of oil consumption and assess the overall health of the engine.
Solution:
If oil consumption is suspected to be related to head gasket failure, prompt action is necessary to prevent further damage to the engine.
The solution typically involves replacing the faulty head gasket with a new one.
Additionally, inspecting the cylinder head and engine block for any signs of damage or warping is essential to ensure proper sealing with the new gasket.
Conclusion:
Oil consumption is a common symptom of head gasket failure, indicating a breach in the seal between the combustion chamber and the engine’s lubrication system.
By understanding the signs and causes of oil consumption and performing diagnostic tests, you can identify head gasket issues early on and take appropriate measures to address them, preserving the longevity and performance of your vehicle’s engine.
3. Oil Mixing With Coolant
Oil mixing with coolant is a troubling sign for any vehicle owner, indicating a serious problem within the engine.
This issue typically arises due to a compromised head gasket, which forms a crucial seal between the engine block and cylinder head. When this seal fails, it allows fluids to mix, leading to a host of potential problems.
Understanding the causes, symptoms, and solutions for oil mixing with coolant is essential for maintaining the health and longevity of your vehicle’s engine.
Understanding Oil Mixing With Coolant:
1. Causes of Mixing:
The primary cause of oil mixing with coolant is a blown or deteriorated head gasket.
This breach in the gasket allows engine oil and coolant to intermix, often resulting in a milky or frothy substance in the coolant reservoir or engine oil.
2. Consequences:
Oil mixing with coolant can have severe consequences for the engine’s performance and longevity.
It compromises the lubricating properties of the engine oil, leading to increased friction and wear on internal components.
Additionally, it can cause overheating, corrosion, and damage to vital engine parts if left untreated.
Identifying Symptoms:
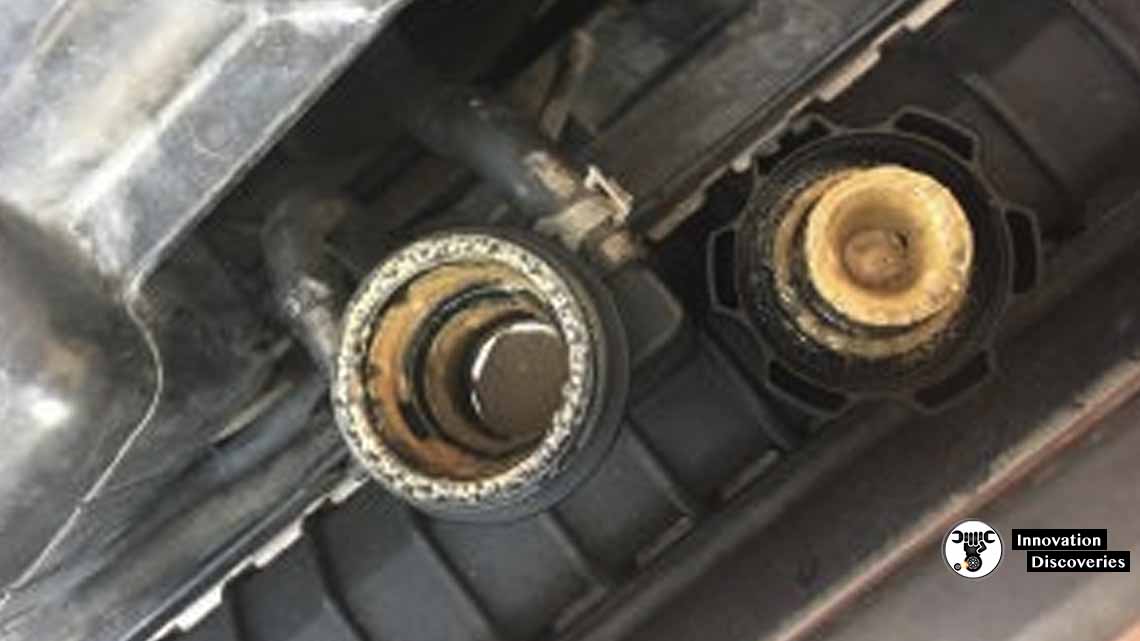
1. Milky Substance:
One of the most apparent signs of oil mixing with coolant is the presence of a milky or frothy substance in either the engine oil or coolant reservoir.
This indicates the presence of oil and coolant mixing together.
2. Overheating:
Oil mixing with coolant can disrupt the engine’s cooling system, leading to overheating issues.
If you notice your engine temperature gauge rising abnormally or frequent overheating, it may be due to oil contamination in the coolant.
Diagnosing the Issue:
1. Visual Inspection:
A visual inspection of the coolant reservoir and engine oil can often reveal signs of contamination. Look for a milky or frothy substance in either fluid, indicating oil mixing with coolant.
2. Cooling System Pressure Test:
Pressurizing the cooling system can help detect leaks and confirm if oil is entering the coolant passages. A drop in pressure over time suggests a leak, potentially due to a faulty head gasket.
Solution:
Addressing oil mixing with coolant requires prompt action to prevent further damage to the engine. The solution typically involves replacing the blown head gasket with a new one.
Additionally, flushing the cooling system and engine oil to remove any contaminants is essential to restore optimal performance.
Conclusion:
Oil mixing with coolant is a serious issue that requires immediate attention. By understanding the causes, symptoms, and diagnostic methods for this problem, vehicle owners can take proactive measures to address head gasket issues and preserve the health and longevity of their engine.
Prompt repair and maintenance are crucial for ensuring the continued reliability and performance of the vehicle.
4. Replacing Blown Head Gasket With A New One
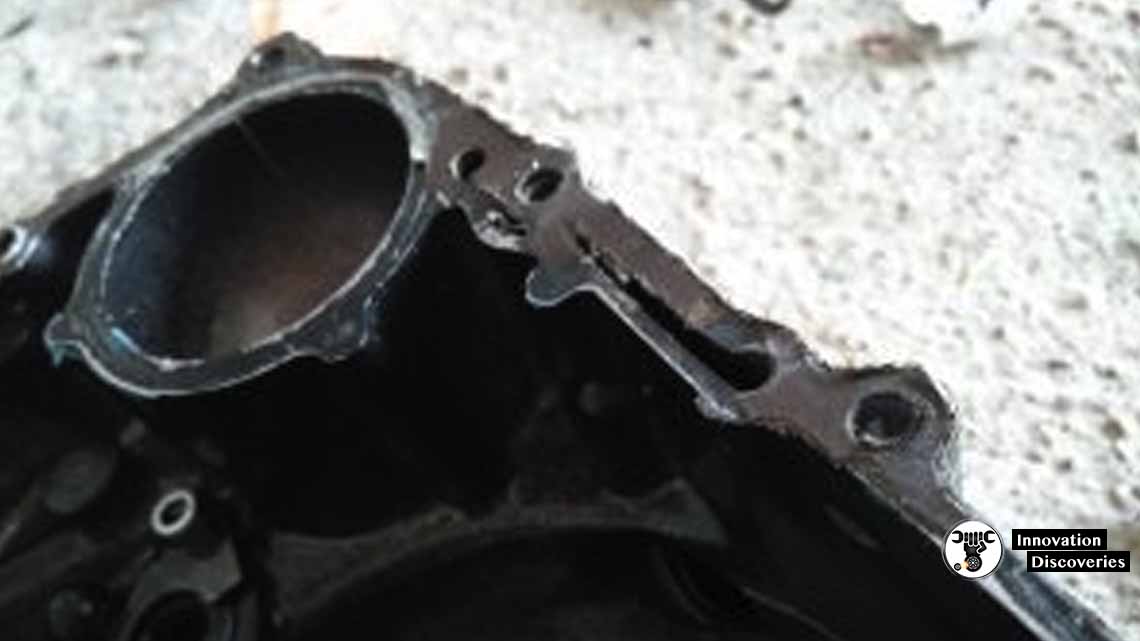
The head gasket is a critical component of an engine, sealing the gap between the cylinder head and engine block, preventing leakage of combustion gases, coolant, and oil.
When this gasket fails, it can lead to various issues, including overheating, coolant and oil mixing, and loss of engine performance.
Replacing a blown head gasket is a complex but necessary repair task that requires precision and attention to detail. Here’s a step-by-step guide on how to replace a blown head gasket with a new one:
1. Preparation:
Gather all necessary tools and materials, including a torque wrench, gasket scraper, replacement head gasket, engine coolant, engine oil, and a service manual specific to your vehicle.
2. Drain Fluids:
Drain the engine oil and coolant from the respective drain plugs located at the bottom of the engine and radiator. Properly dispose of the old fluids in accordance with environmental regulations.
3. Remove Components:
Begin by disconnecting the battery to prevent any electrical mishaps. Then, remove the intake manifold, exhaust manifold, valve cover, timing belt or chain, and any other components obstructing access to the cylinder head.
4. Access the Head Gasket:
Once the components are removed, you’ll have clear access to the cylinder head. Use caution and follow safety protocols when working around the engine to prevent injury.
5. Inspect the Cylinder Head:
Before proceeding further, inspect the cylinder head for signs of damage, warping, or cracks. It may need machining or replacement if significant issues are detected.
6. Remove the Old Gasket:
Carefully scrape off the old gasket material from both the cylinder head and engine block using a gasket scraper or similar tool. Ensure that all surfaces are clean and free of debris before proceeding.
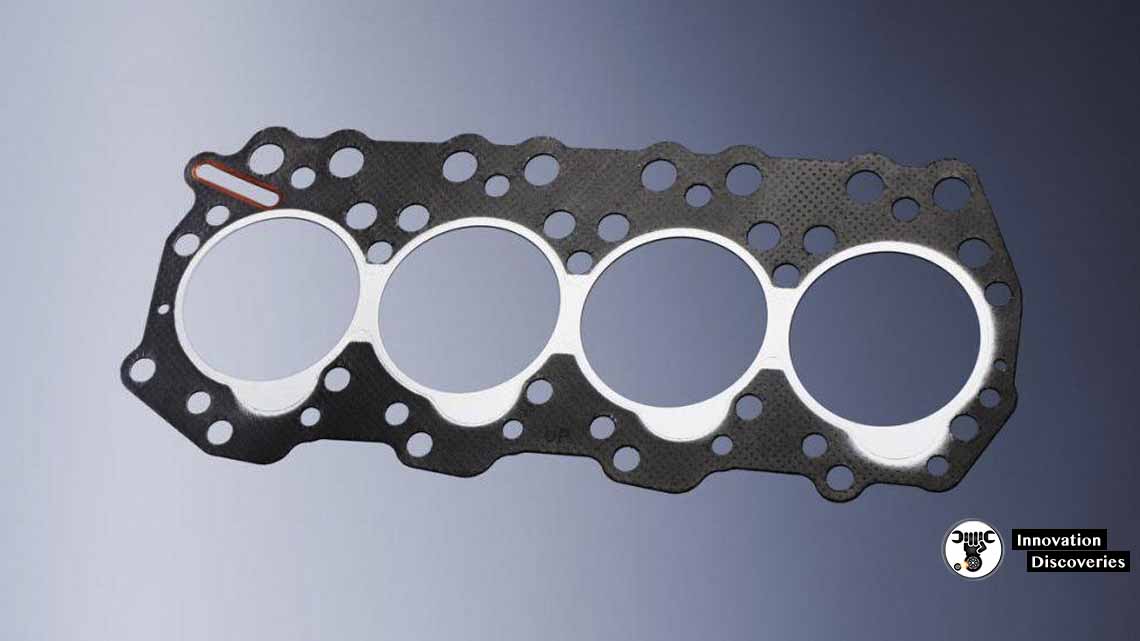
7. Install the New Gasket:
Place the new head gasket onto the engine block, ensuring that it aligns correctly with the cylinder head and engine block. Follow the manufacturer’s specifications for gasket orientation and any specific installation instructions.
8. Reassemble Components:
Reinstall the intake manifold, exhaust manifold, valve cover, timing belt or chain, and any other components that were previously removed. Torque all fasteners to the specified values in the service manual to ensure proper sealing and alignment.
9. Refill Fluids:
Refill the engine with fresh engine oil and coolant, ensuring that the coolant mixture is at the proper concentration. Bleed any air from the cooling system to prevent overheating issues.
10. Test Run:
Start the engine and monitor for any leaks, abnormal noises, or warning lights. Allow the engine to reach operating temperature and verify that it operates smoothly without any issues.
11. Final Checks:
After the test run, recheck all fasteners, connections, and fluid levels to ensure everything is secure and within the proper range. Conduct a final visual inspection to confirm that there are no signs of leakage or abnormalities.
By following these steps meticulously and adhering to manufacturer specifications, you can effectively replace a blown head gasket with a new one, restoring the integrity and performance of your engine.
Remember to exercise caution and consult professional help if needed, especially if you’re unfamiliar with engine repair tasks.
Pro Tips for Replacing a Blown Head Gasket:
Use Genuine Parts:
Always use genuine or high-quality replacement parts, including the head gasket. This ensures compatibility, reliability, and longevity of the repair.
Take Pictures:
Before disassembling components, take pictures or make notes of their placement and orientation. This will help during reassembly, ensuring everything is put back correctly.
Label Components:
Use labeling or organization systems to keep track of removed components and fasteners. This prevents confusion and saves time during reassembly.
Clean Surfaces Thoroughly:
Properly clean all mating surfaces of the cylinder head and engine block before installing the new head gasket. Any residue or debris can compromise the seal and lead to leaks.
Check Cylinder Head Condition:
Inspect the cylinder head carefully for cracks, warping, or other damage. If necessary, have it machined or replaced to ensure a flat and smooth surface for the new gasket.
Follow Torque Specifications:
Always torque fasteners to the manufacturer’s specifications using a calibrated torque wrench. Incorrect torque can lead to leaks or damage to components.
Replace Additional Components:
Consider replacing related components such as bolts, seals, and gaskets while the engine is disassembled. This prevents future issues and ensures comprehensive maintenance.
Perform Additional Checks:
While the engine is disassembled, take the opportunity to inspect other components such as the timing belt, water pump, and seals for wear or damage. Replace as necessary to prevent future failures.
Use Sealant Appropriately:
Follow the manufacturer’s recommendations regarding the use of sealant on the head gasket or other components. Applying sealant where necessary can improve sealing and prevent leaks.
Test Before Reassembly:
Before reassembling all components, perform a pressure or leak test on the cooling system to ensure there are no leaks. This saves time and effort by identifying issues early.
Document the Repair:
Keep detailed records of the repair process, including parts replaced, torque values used, and any additional maintenance performed. This documentation can be valuable for future reference or resale.
By incorporating these pro tips into the head gasket replacement process, you can ensure a thorough and effective repair that restores the engine’s performance and reliability.
Remember to work methodically, follow manufacturer recommendations, and prioritize safety throughout the repair.
READ MORE:


6 Comments