Replacing a master cylinder might sound like a daunting task, but with the right tools and guidance, it’s a job that you can easily tackle yourself. The master cylinder plays a crucial role in your vehicle’s braking system, so it’s essential to keep it in optimal condition.
In this guide, we’ll walk you through the step-by-step process of replacing a master cylinder, empowering you to maintain your vehicle’s safety and performance.
Step 1:
Gather Your Tools and Materials Before you begin, make sure you have all the necessary tools and materials on hand. You’ll need:
New master cylinder
Brake fluid
Wrench set
Socket set
Brake bleeding kit
Jack and jack stands
Clean rags
Step 2:
Prepare Your Vehicle Park your vehicle on a level surface and engage the parking brake. Loosen the lug nuts on the wheels of the vehicle, but do not remove them completely. Use a jack to lift the vehicle and support it securely with jack stands.
Step 3:
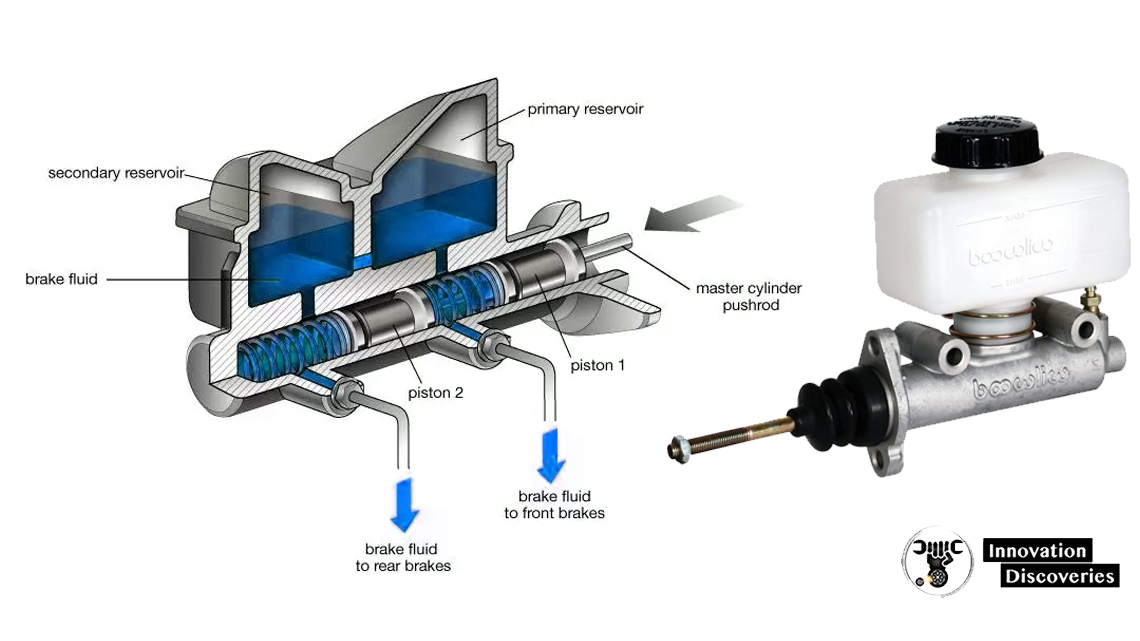
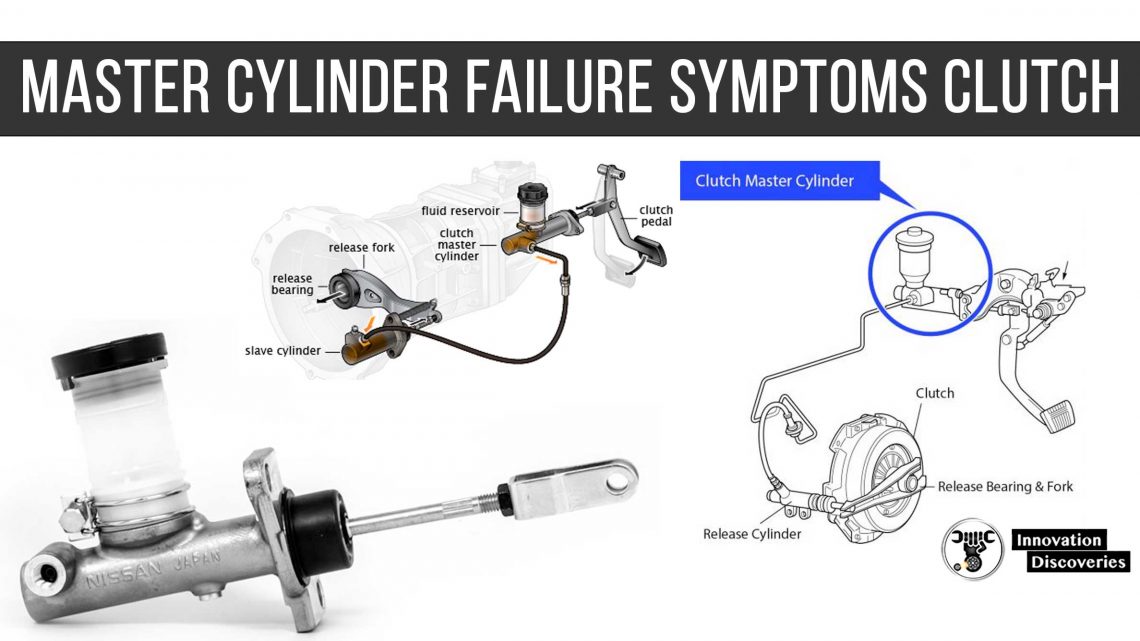
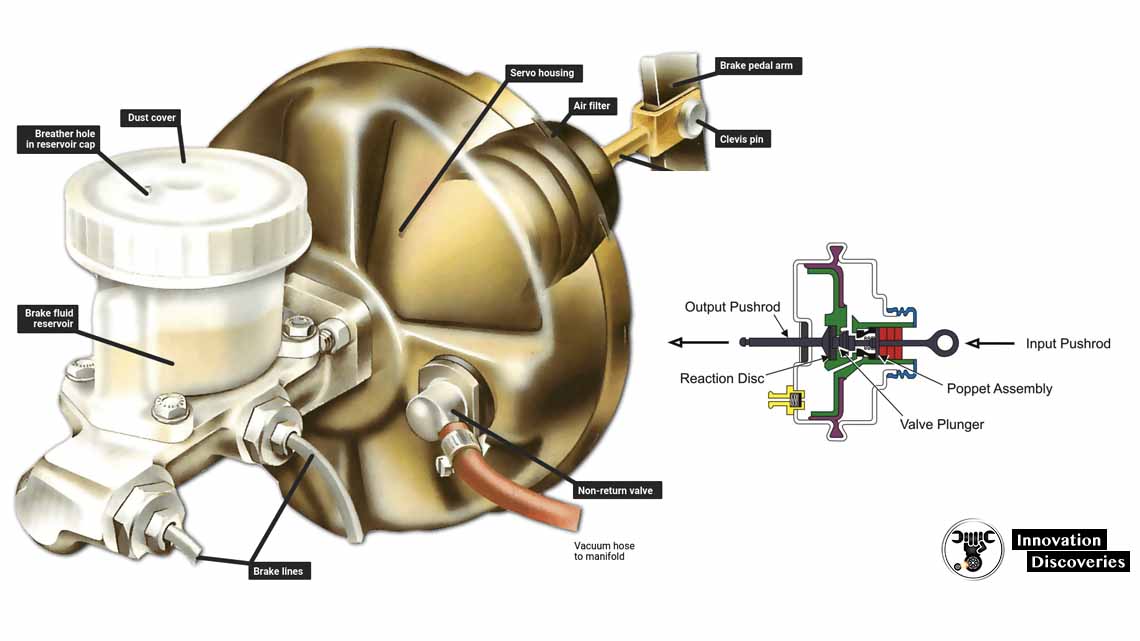
Locate the Master Cylinder The master cylinder is typically located on the driver’s side of the engine compartment, near the firewall. It’s a small metal cylinder with brake lines connected to it.
Step 4:
Remove the Old Master Cylinder Start by disconnecting the brake lines from the master cylinder using a wrench. Be careful not to damage the brake lines or fittings. Once the brake lines are disconnected, remove the bolts or nuts securing the master cylinder to the brake booster.
Step 5:
Install the New Master Cylinder Position the new master cylinder in place and secure it with the bolts or nuts. Reconnect the brake lines to the new master cylinder, ensuring they are tightened securely.
Step 6:
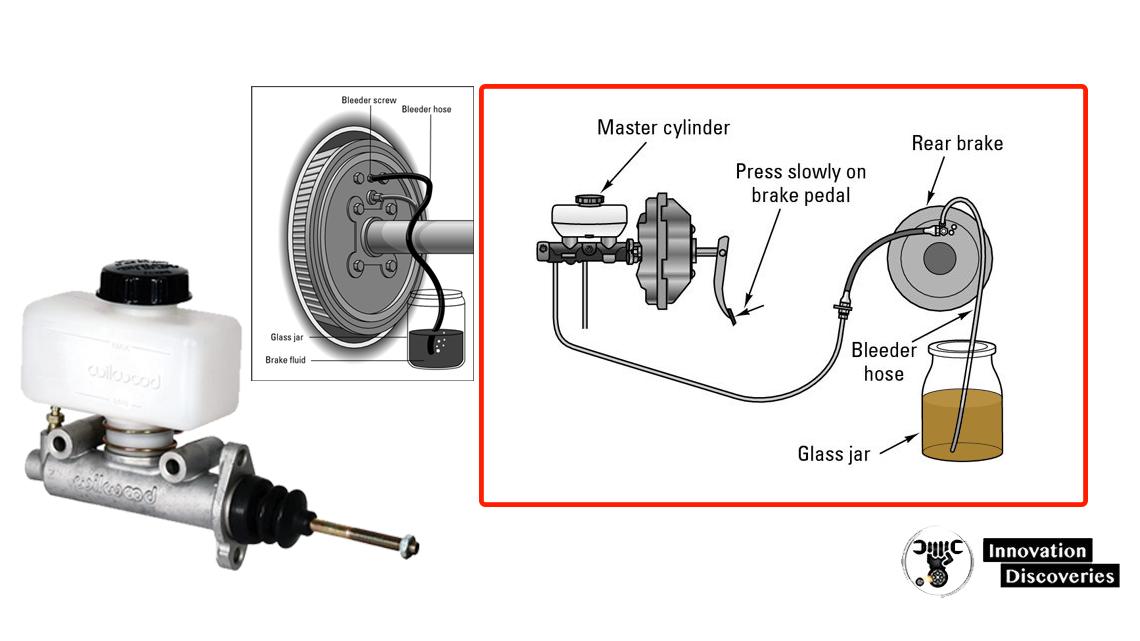
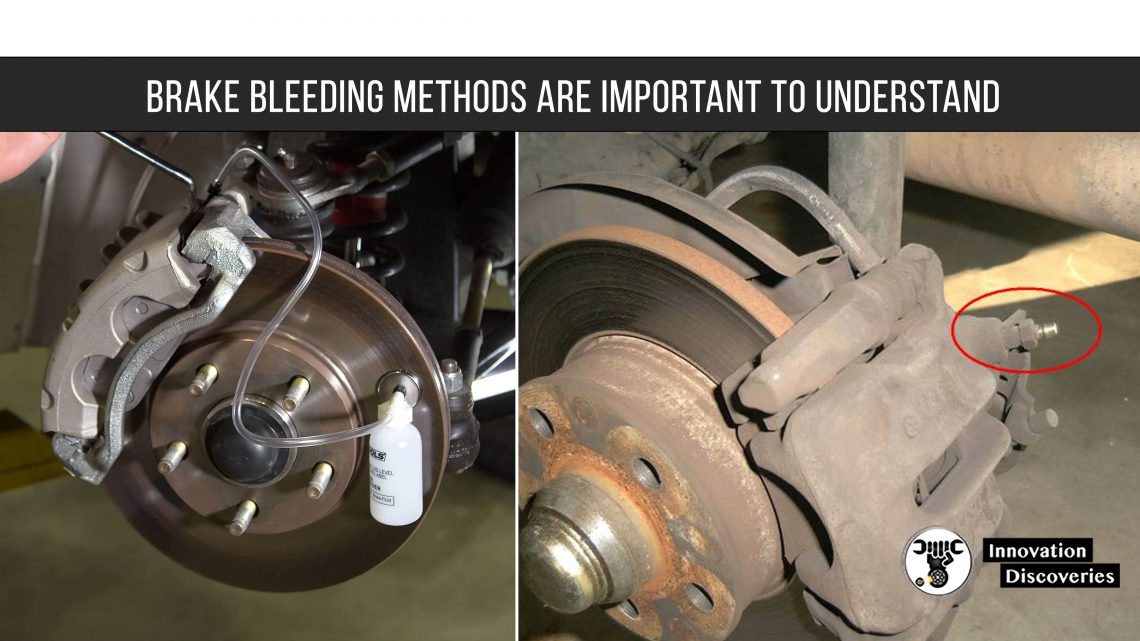
Bleed the Brakes Bleeding the brakes is essential to remove any air bubbles from the brake lines, ensuring proper brake function. Follow the manufacturer’s instructions for bleeding the brakes, using a brake bleeding kit and fresh brake fluid.
Don’t Miss:
Step 7:
Test the Brakes After bleeding the brakes, pump the brake pedal several times to build pressure in the brake system. Check for any leaks around the master cylinder and brake lines. Once you’re confident there are no leaks, lower the vehicle and test drive it to ensure the brakes are functioning correctly.
Conclusion:
Replacing a master cylinder is a straightforward task that can be completed with basic mechanical skills and the right tools. By following these easy steps, you can ensure your vehicle’s braking system remains in top condition, providing you with peace of mind on the road.