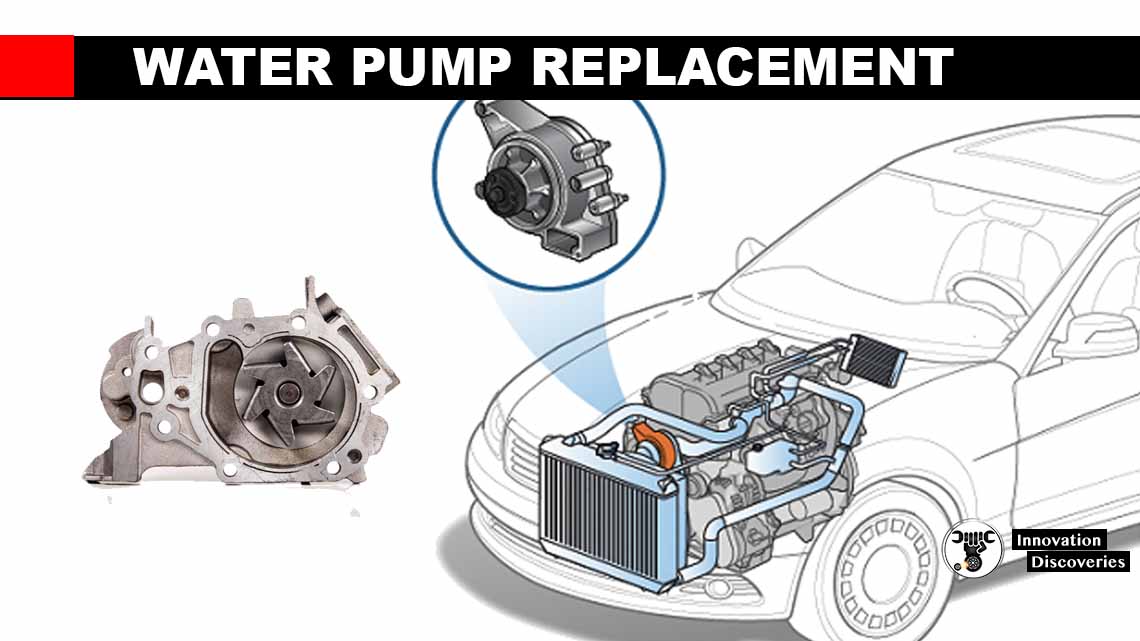
Water pumps are essential components in various systems, from cars to home plumbing. They move water through a system, providing cooling, heating, or other essential functions. However, like all mechanical components, water pumps can wear out over time, leading to leaks, reduced efficiency, or complete failure. In this comprehensive guide, we’ll discuss the importance of water pumps, signs they need replacement, and step-by-step instructions for replacing a water pump in common applications.
Why Water Pumps Matter
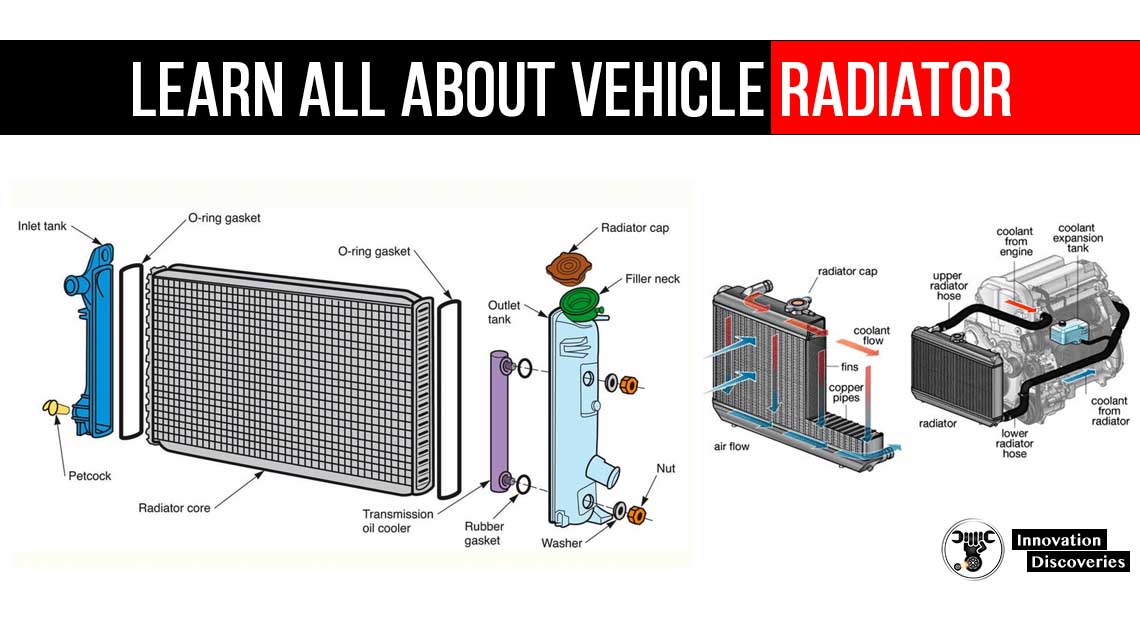
Water pumps play a critical role in systems where fluid movement is essential. In automotive engines, for example, they circulate coolant through the engine block, radiator, and other components to prevent overheating. In residential plumbing, they ensure water is distributed to various fixtures, maintaining water pressure and flow.
A failing water pump can lead to significant issues. In a car, it can cause engine overheating, leading to costly repairs or even engine failure. In a home, a malfunctioning pump can result in reduced water pressure or complete loss of water flow, disrupting daily life. Understanding when and how to replace a water pump can save you from major headaches down the road.
Also, read – How an engine cooling system works
Signs a Water Pump Needs Replacement
Before diving into the replacement process, it’s crucial to recognize the signs of a failing water pump. Here are some common indicators:
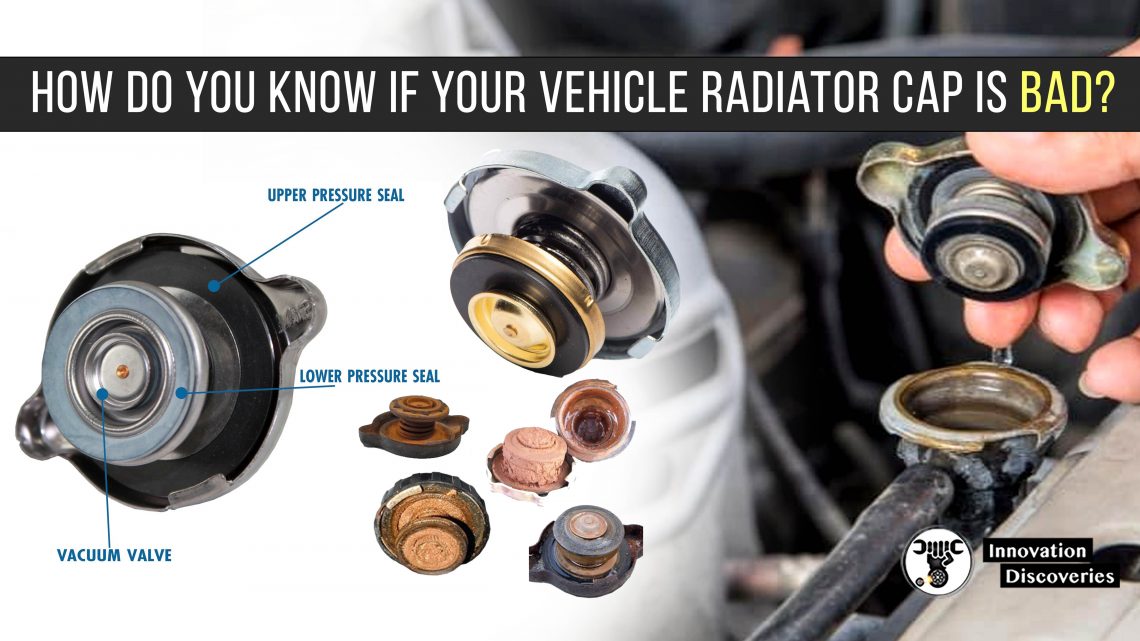
- Leaks: Visible coolant or water leaks around the water pump area are a clear sign of a problem. In cars, this might be a coolant puddle under your vehicle.
- Overheating: If your car’s engine is overheating or your home’s water pressure is inconsistent, a failing water pump could be the cause.
- Unusual Noises: Grinding, whining, or squeaking noises from the water pump often indicate worn bearings or other internal issues.
- Steam or Smoke: In automotive applications, steam from the engine bay could suggest a coolant leak, often related to the water pump.
- Inconsistent Water Flow: In residential plumbing, a water pump failure might result in fluctuating water pressure or complete loss of water.
Water Pump Replacement: Step-by-Step Guide
The following steps outline the general process for replacing a water pump in an automobile and a home plumbing system. Note that specific instructions may vary based on the make and model of your car or the type of water pump used in your plumbing system.
Replacing a Water Pump in a Car
- Gather Tools and Supplies: You will need a new water pump, gaskets, sealant, a wrench set, a drain pan, coolant, and possibly a pulley removal tool.
- Prepare the Car: Park on a flat surface, turn off the engine, and let it cool. Disconnect the battery to prevent electrical shocks.
- Drain the Coolant: Place a drain pan under the radiator and open the drain valve to remove the coolant. Ensure proper disposal of used coolant.
- Remove Components: Depending on your car, you may need to remove belts, hoses, and other components to access the water pump.
- Remove the Water Pump: Unbolt the old water pump and carefully remove it. Scrape off any old gasket material from the mounting surface.
- Install the New Water Pump: Apply a thin layer of sealant and place the new gasket on the water pump. Install the pump and tighten the bolts to the manufacturer’s specifications.
- Reassemble Components: Reattach belts, hoses, and any other components removed earlier.
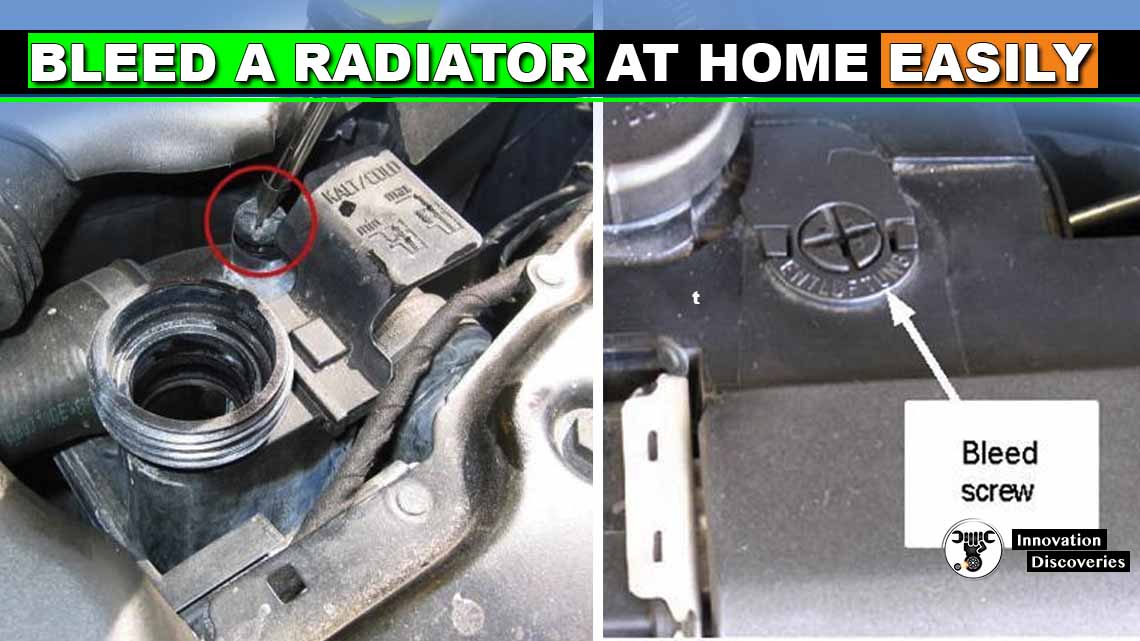
- Refill the Coolant: Refill the radiator with the appropriate coolant and bleed the system to remove air bubbles.
- Test the System: Reconnect the battery, start the car, and check for leaks or overheating.
Also, read – CAR AIR CONDITIONING /AC/ SYSTEM: FUNCTION, COMPONENTS, AND WORKING PRINCIPLE
Replacing a Water Pump in a Home Plumbing System
- Turn Off the Water Supply: Locate the main water shutoff valve and turn it off to prevent water flow during the replacement.
- Drain the System: Open faucets to drain water from the plumbing system.
- Remove the Old Pump: Depending on your system, this may involve unbolting the pump or detaching it from a mounting bracket. Disconnect any electrical connections if it’s an electric pump.
- Install the New Pump: Attach the new pump to its mounting location and reconnect any electrical connections. Ensure all seals and gaskets are properly installed to prevent leaks.
- Turn On the Water Supply: Open the main valve and check for leaks.
- Test the System: Open faucets to ensure consistent water pressure and flow. Check for any leaks around the new pump.
Conclusion
Water pump replacement can seem daunting, but with the right tools, knowledge, and preparation, it can be a manageable DIY project. Whether you’re working on your car or home plumbing, the key is to identify the signs of a failing water pump and take action promptly to avoid more significant problems. By following the steps outlined in this guide, you can ensure your water pump replacement is successful and your system runs smoothly.
See More:
- Detecting Head Gasket Issues And The Solution
- Symptoms Of A Blown Head Gasket? How To Prevent And Fix It
Discover More:

Read More:
- WORKING OF THERMOSTATS
- CAR THERMOSTAT FUNCTIONS, FAILURE SYMPTOMS, AND REPLACEMENT COST
- PISTON DAMAGE FROM OVERHEATING
- SYMPTOMS OF AN EXHAUST LEAK
- EXHAUST GAS RECIRCULATION (EGR)
- HOW AN ENGINE COOLING SYSTEM WORKS
- WATER COOLING VS AIR COOLING
Read: BLEED A RADIATOR AT HOME EASILY
HOW TO APPLY A TEMPORARY REPAIR FOR UPPER RADIATOR HOSE?


One Comment